Create and Edit Prompts
This guide walks you through the process of creating new prompts and managing their versions within the MLflow Prompt Registry.
Creating a New Prompt
You can initiate a new prompt in the MLflow Prompt Registry in two primary ways: through the MLflow UI or programmatically using the Python SDK.
- UI
- Python
- Navigate to the Prompt Registry section in your MLflow instance.
- Click on the "Create Prompt" (or similar) button.
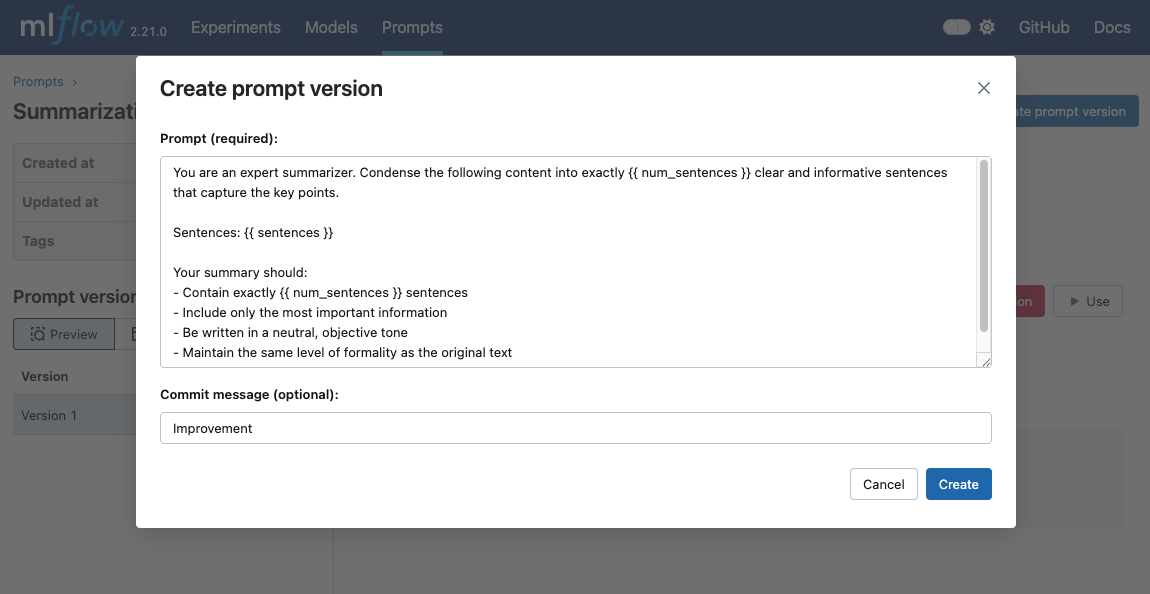
- Fill in the prompt details such as name, prompt template text, and commit message (optional)
To create a new prompt programmatically, use the mlflow.genai.register_prompt() function. This is particularly useful for automating prompt creation or managing prompts as part of a larger script.
import mlflow

# Use double curly braces for variables in the template
initial_template = """\
Summarize content you are provided with in {{ num_sentences }} sentences.

Sentences: {{ sentences }}
"""

# Register a new prompt
prompt = mlflow.genai.register_prompt(
    name="summarization-prompt",
    template=initial_template,
    # Optional: Provide a commit message to describe the changes
    commit_message="Initial commit",
    # Optional: Set tags applies to the prompt (across versions)
    tags={
        "author": "author@example.com",
        "task": "summarization",
        "language": "en",
    },
)

# The prompt object contains information about the registered prompt
print(f"Created prompt '{prompt.name}' (version {prompt.version})")
Editing an Existing Prompt (Creating New Versions)
Once a prompt version is created, its template and initial metadata are immutable. Editing an existing prompt means creating a new version of that prompt with your changes. This Git-like behavior ensures a complete history and allows you to revert to previous versions if needed.
- UI
- Python
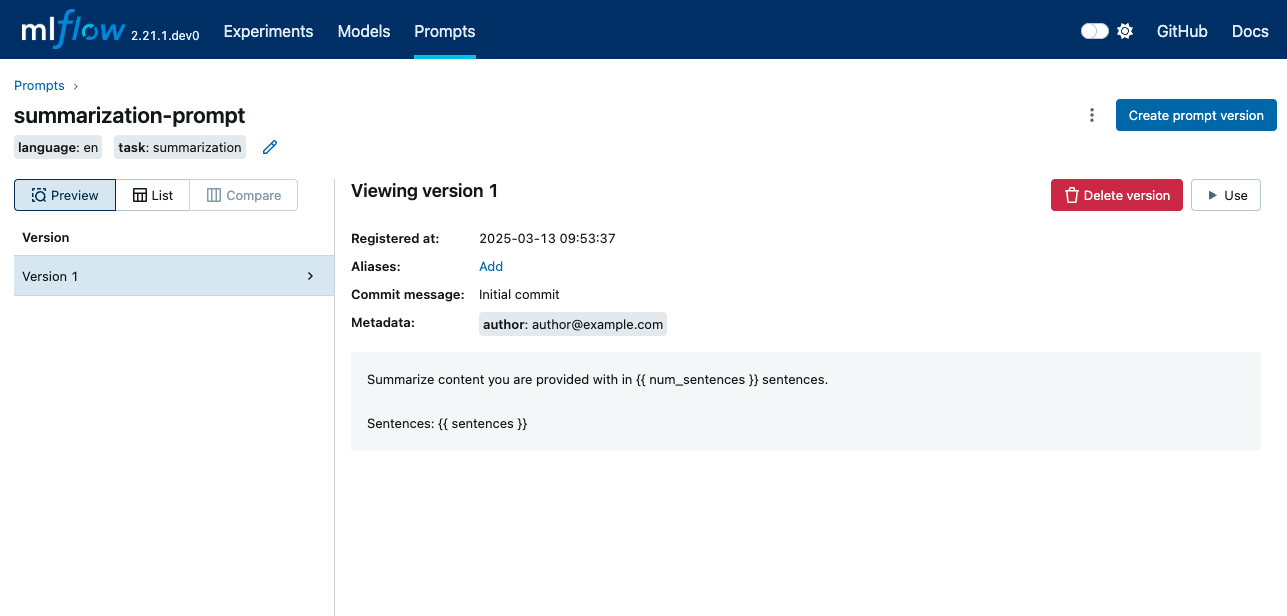
- Navigate to the specific prompt you wish to edit in the Prompt Registry.
- Select the version you want to base your new version on (often the latest).
- Look for an "Edit Prompt" or "Create New Version" button.
- Modify the template, update metadata, or change tags as needed.
- Provide a new Commit Message describing the changes you made for this new version.
To create a new version of an existing prompt, you again use the mlflow.genai.register_prompt() function, but this time, you provide the name of an existing prompt. MLflow will automatically increment the version number.
import mlflow

new_template = """\
You are an expert summarizer. Condense the following content into exactly {{ num_sentences }} clear and informative sentences that capture the key points.

Sentences: {{ sentences }}

Your summary should:
- Contain exactly {{ num_sentences }} sentences
- Include only the most important information
- Be written in a neutral, objective tone
- Maintain the same level of formality as the original text
"""

# Register a new version of an existing prompt
updated_prompt = mlflow.genai.register_prompt(
    name="summarization-prompt",  # Specify the existing prompt name
    template=new_template,
    commit_message="Improvement",
    tags={
        "author": "author@example.com",
    },
)
Understanding Immutability
It's crucial to remember that prompt versions in the MLflow Prompt Registry are immutable. Once mlflow.genai.register_prompt() is called and a version is created (or a new version of an existing prompt is made), the template, initial commit message, and initial metadata for that specific version cannot be altered. This design choice provides strong guarantees for reproducibility and lineage tracking.
If you need to change a prompt, you always create a new version.
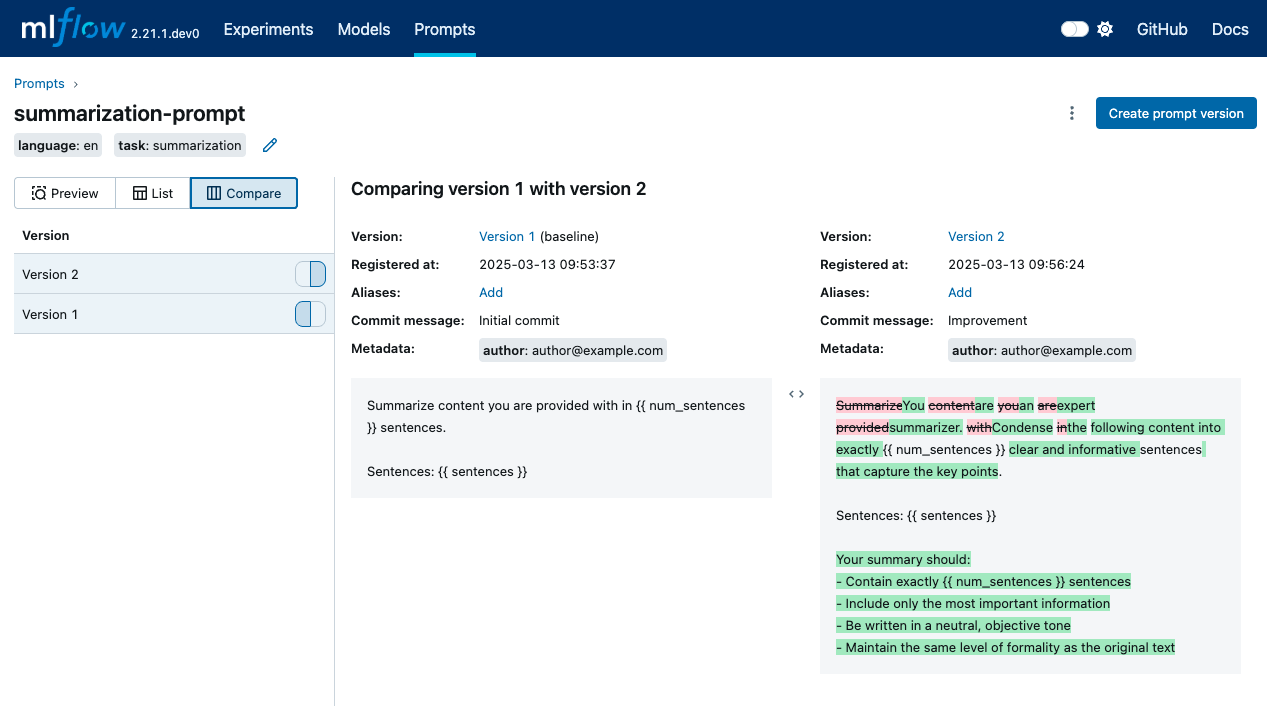
Comparing Prompt Versions
The MLflow UI provides tools to compare different versions of a prompt. This typically includes a side-by-side diff view, allowing you to easily see what changed in the template text, metadata, or tags between versions.