MLflow Authentication
Note
This feature is still experimental and may change in a future release without warning.
MLflow supports basic HTTP authentication to enable access control over experiments and registered models. Once enabled, any visitor will be required to login before they can view any resource from the Tracking Server.
Table of Contents
MLflow Authentication provides Python and REST API for managing users and permissions.
Overview
To enable MLflow authentication, launch the MLflow UI with the following command:
mlflow server --app-name basic-auth
Server admin can choose to disable this feature anytime by restarting the server without the app-name flag.
Any users and permissions created will be persisted on a SQL database and will be back in service once the feature is re-enabled.
Due to the nature of HTTP authentication, it is only supported on a remote Tracking Server, where users send requests to the server via REST APIs.
How It Works
Permissions
The available permissions are:
Permission |
Can read |
Can update |
Can delete |
Can manage |
|---|---|---|---|---|
|
Yes |
No |
No |
No |
|
Yes |
Yes |
No |
No |
|
Yes |
Yes |
Yes |
Yes |
|
No |
No |
No |
No |
The default permission for all users is READ. It can be changed in the configuration file.
Permissions can be granted on individual resources for each user.
Supported resources include Experiment and Registered Model.
To access an API endpoint, an user must have the required permission.
Otherwise, a 403 Forbidden response will be returned.
Required Permissions for accessing experiments:
API |
Endpoint |
Method |
Required permission |
|---|---|---|---|
|
|
None |
|
|
|
can_read |
|
|
|
can_read |
|
|
|
can_delete |
|
|
|
can_delete |
|
|
|
can_update |
|
|
|
None |
|
|
|
None |
|
|
|
can_update |
|
|
|
can_update |
|
|
|
can_read |
|
|
|
can_update |
|
|
|
can_delete |
|
|
|
can_delete |
|
|
|
None |
|
|
|
can_update |
|
|
|
can_update |
|
|
|
can_update |
|
|
|
can_update |
|
|
|
can_update |
|
|
|
can_update |
|
|
|
can_read |
|
|
|
can_read |
Required Permissions for accessing registered models:
API |
Endpoint |
Method |
Required permission |
|---|---|---|---|
|
|
None |
|
|
|
can_update |
|
|
|
can_update |
|
|
|
can_delete |
|
|
|
can_read |
|
|
|
None |
|
|
|
can_read |
|
|
|
can_read |
|
|
|
can_update |
|
|
|
can_update |
|
|
|
can_update |
|
|
|
can_delete |
|
|
|
can_read |
|
|
|
can_update |
|
|
|
can_update |
|
|
|
can_update |
|
|
|
can_delete |
|
|
|
can_read |
|
|
|
None |
|
|
|
can_read |
|
|
|
can_update |
|
|
|
can_delete |
MLflow Authentication introduces several new API endpoints to manage users and permissions.
API |
Endpoint |
Method |
Required permission |
|---|---|---|---|
|
|
None |
|
|
|
Only readable by that user |
|
|
|
Only updatable by that user |
|
|
|
Only admin |
|
|
|
Only admin |
|
|
|
can_manage |
|
|
|
can_manage |
|
|
|
can_manage |
|
|
|
can_manage |
|
|
|
can_manage |
|
|
|
can_manage |
|
|
|
can_manage |
|
|
|
can_manage |
Some APIs will also have their behaviour modified.
For example, the creator of an experiment will automatically be granted MANAGE permission
on that experiment, so that the creator can grant or revoke other users’ access to that experiment.
API |
Endpoint |
Method |
Effect |
|---|---|---|---|
|
|
Automatically grants |
|
|
|
Automatically grants |
|
|
|
Only returns experiments which the user has |
|
|
|
Only returns experiments which the user has |
|
|
|
Only returns experiments which the user has |
|
|
|
Only returns registered models which the user has |
|
|
|
Only returns registered models which the user has |
Permissions Database
All users and permissions are stored in a database in basic_auth.db, relative to the directory where MLflow server is launched.
The location can be changed in the configuration file. To run migrations, use the following command:
python -m mlflow.server.auth db upgrade --url <database_url>
Admin Users
Admin users have unrestricted access to all MLflow resources,
including creating or deleting users, updating password and admin status of other users,
granting or revoking permissions from other users, and managing permissions for all
MLflow resources, even if NO_PERMISSIONS is explicitly set to that admin account.
MLflow has a built-in admin user that will be created the first time that the MLflow authentication feature is enabled.
Note
It is recommended that you update the default admin password as soon as possible after creation.
The default admin user credentials are as follows:
Username |
Password |
|---|---|
|
|
Multiple admin users can exist by promoting other users to admin, using the 2.0/mlflow/users/update-admin endpoint.
# authenticate as built-in admin user
export MLFLOW_TRACKING_USERNAME=admin
export MLFLOW_TRACKING_PASSWORD=password
from mlflow.server import get_app_client

tracking_uri = "http://localhost:5000/"

auth_client = get_app_client("basic-auth", tracking_uri=tracking_uri)
auth_client.create_user(username="user1", password="pw1")
auth_client.update_user_admin(username="user1", is_admin=True)
Managing Permissions
MLflow provides REST APIs and a client class
AuthServiceClient to manage users and permissions.
To instantiate AuthServiceClient, it is recommended that you use mlflow.server.get_app_client().
from mlflow import MlflowClient
from mlflow.server import get_app_client

tracking_uri = "http://localhost:5000/"

auth_client = get_app_client("basic-auth", tracking_uri=tracking_uri)
auth_client.create_user(username="user1", password="pw1")
auth_client.create_user(username="user2", password="pw2")

client = MlflowClient(tracking_uri=tracking_uri)
experiment_id = client.create_experiment(name="experiment")

auth_client.create_experiment_permission(
    experiment_id=experiment_id, username="user2", permission="MANAGE"
)
Authenticating to MLflow
Using MLflow UI
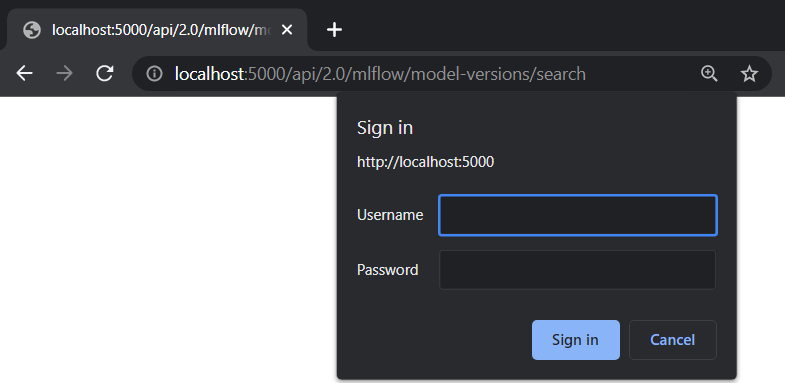
When a user first visits the MLflow UI on a browser, they will be prompted to login. There is no limit to how many login attempts can be made.
Currently, MLflow UI does not display any information about the current user. Once a user is logged in, the only way to log out is to close the browser.
Using Environment Variables
MLflow provides two environment variables for authentication: MLFLOW_TRACKING_USERNAME and MLFLOW_TRACKING_PASSWORD.
To use basic authentication, you must set both environment variables.
export MLFLOW_TRACKING_USERNAME=username
export MLFLOW_TRACKING_PASSWORD=password
import mlflow

mlflow.set_tracking_uri("https://<mlflow_tracking_uri>/")
with mlflow.start_run():
    ...
Using Credentials File
You can save your credentials in a file to remove the need for setting environment variables every time.
The credentials should be saved in ~/.mlflow/credentials using INI format. Note that the password
will be stored unencrypted on disk, and is protected only by filesystem permissions.
If the environment variables MLFLOW_TRACKING_USERNAME and MLFLOW_TRACKING_PASSWORD are configured,
they override any credentials provided in the credentials file.
Using REST API
A user can authenticate using the HTTP Authorization request header.
See https://developer.mozilla.org/en-US/docs/Web/HTTP/Authentication for more information.
In Python, you can use the requests library:
import requests

response = requests.get(
    "https://<mlflow_tracking_uri>/",
    auth=("username", "password"),
)
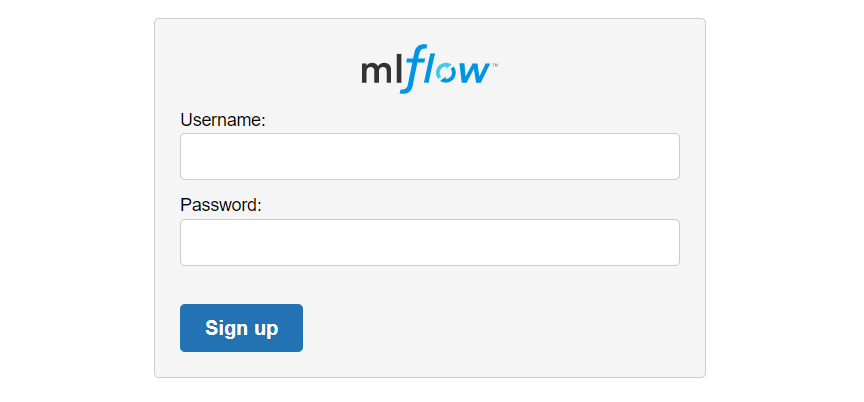
Creating a New User
Important
To create a new user, you are required to authenticate with admin privileges.
Using REST API
Alternatively, you can send POST requests to the Tracking Server endpoint 2.0/users/create.
In Python, you can use the requests library:
import requests

response = requests.post(
    "https://<mlflow_tracking_uri>/api/2.0/mlflow/users/create",
    json={
        "username": "username",
        "password": "password",
    },
)
Using MLflow AuthServiceClient
MLflow AuthServiceClient
provides a function to create new users easily.
import mlflow

auth_client = mlflow.server.get_app_client(
    "basic-auth", tracking_uri="https://<mlflow_tracking_uri>/"
)
auth_client.create_user(username="username", password="password")
Configuration
Authentication configuration is located at mlflow/server/auth/basic_auth.ini:
Variable |
Description |
|---|---|
|
Default permission on all resources |
|
Database location to store permission and user data |
|
Default admin username if the admin is not already created |
|
Default admin password if the admin is not already created |
|
Function to authenticate requests |
Alternatively, assign the environment variable MLFLOW_AUTH_CONFIG_PATH to point
to your custom configuration file.
The authorization_function setting supports pluggable authentication methods
if you want to use another authentication method than HTTP basic auth. The value
specifies module_name:function_name. The function has the following signature:
def authenticate_request() -> Union[Authorization, Response]:
    ...
The function should return a werkzeug.datastructures.Authorization object if
the request is authenticated, or a Response object (typically
401: Unauthorized) if the request is not authenticated. For an example of how
to implement a custom authentication method, see tests/server/auth/jwt_auth.py.
NOTE: This example is not intended for production use.
Connecting to a Centralized Database
By default, MLflow Authentication uses a local SQLite database to store user and permission data. In the case of a multi-node deployment, it is recommended to use a centralized database to store this data.
To connect to a centralized database, you can set the database_uri configuration variable to the database URL.
[mlflow]
database_uri = postgresql://username:password@hostname:port/database
Then, start the MLflow server with the MLFLOW_AUTH_CONFIG_PATH environment variable
set to the path of your configuration file.
MLFLOW_AUTH_CONFIG_PATH=/path/to/my_auth_config.ini mlflow server --app-name basic-auth
The database must be created before starting the MLflow server. The database schema will be created automatically when the server starts.
Custom Authentication
MLflow authentication is designed to be extensible. If your organization desires more advanced authentication logic (e.g., token-based authentication), it is possible to install a third party plugin or to create your own plugin.
Your plugin should be an installable Python package.
It should include an app factory that extends the MLflow app and, optionally, implement a client to manage permissions.
The app factory function name will be passed to the --app argument in Flask CLI.
See https://flask.palletsprojects.com/en/latest/cli/#application-discovery for more information.
from flask import Flask
from mlflow.server import app


def create_app(app: Flask = app):
    app.add_url_rule(...)
    return app


class MyAuthClient:
    ...
Then, the plugin should be installed in your Python environment:
pip install my_auth
Then, register your plugin in mlflow/setup.py:
setup(
    ...,
    entry_points="""
        ...

        [mlflow.app]
        my-auth=my_auth:create_app

        [mlflow.app.client]
        my-auth=my_auth:MyAuthClient
    """,
)
Then, you can start the MLflow server:
mlflow server --app-name my-auth