Prompt Engineering UI (Experimental)
Starting in MLflow 2.7, the MLflow Tracking UI provides a best-in-class experience for prompt engineering. With no code required, you can try out multiple LLMs from the MLflow AI Gateway, parameter configurations, and prompts to build a variety of models for question answering, document summarization, and beyond. Using the embedded Evaluation UI, you can also evaluate multiple models on a set of inputs and compare the responses to select the best one. Every model created with the prompt engineering UI is stored in the MLflow Model format and can be deployed for batch or real time inference. All configurations (prompt templates, choice of LLM, parameters, etc.) are tracked as MLflow Runs.
Quickstart
The following guide will get you started with MLflow’s UI for prompt engineering.
Step 1: Create an MLflow AI Gateway Completions or Chat Endpoint
To use the prompt engineering UI, you need to create one or more MLflow AI Gateway
completions or chat Endpoints. Follow the
MLflow AI Gateway Quickstart guide to easily create an endpoint in less than five
minutes. If you already have access to an MLflow AI Gateway endpoint of type llm/v1/completions
or llm/v1/chat, you can skip this step.
mlflow gateway start --config-path config.yaml --port 7000
Step 2: Connect the MLflow AI Gateway to your MLflow Tracking Server
The prompt engineering UI also requires a connection between the MLflow AI Gateway and the MLflow
Tracking Server. To connect the MLflow AI Gateway with the MLflow Tracking Server, simply set the
MLFLOW_DEPLOYMENTS_TARGET environment variable in the environment where the server is running and
restart the server. For example, if the MLflow AI Gateway is running at http://localhost:7000, you
can start an MLflow Tracking Server in a shell on your local machine and connect it to the
MLflow AI Gateway using the mlflow server command as follows:
export MLFLOW_DEPLOYMENTS_TARGET="http://127.0.0.1:7000"
mlflow server --port 5000
Step 3: Create or find an MLflow Experiment
Next, open an existing MLflow Experiment in the MLflow UI, or create a new experiment.
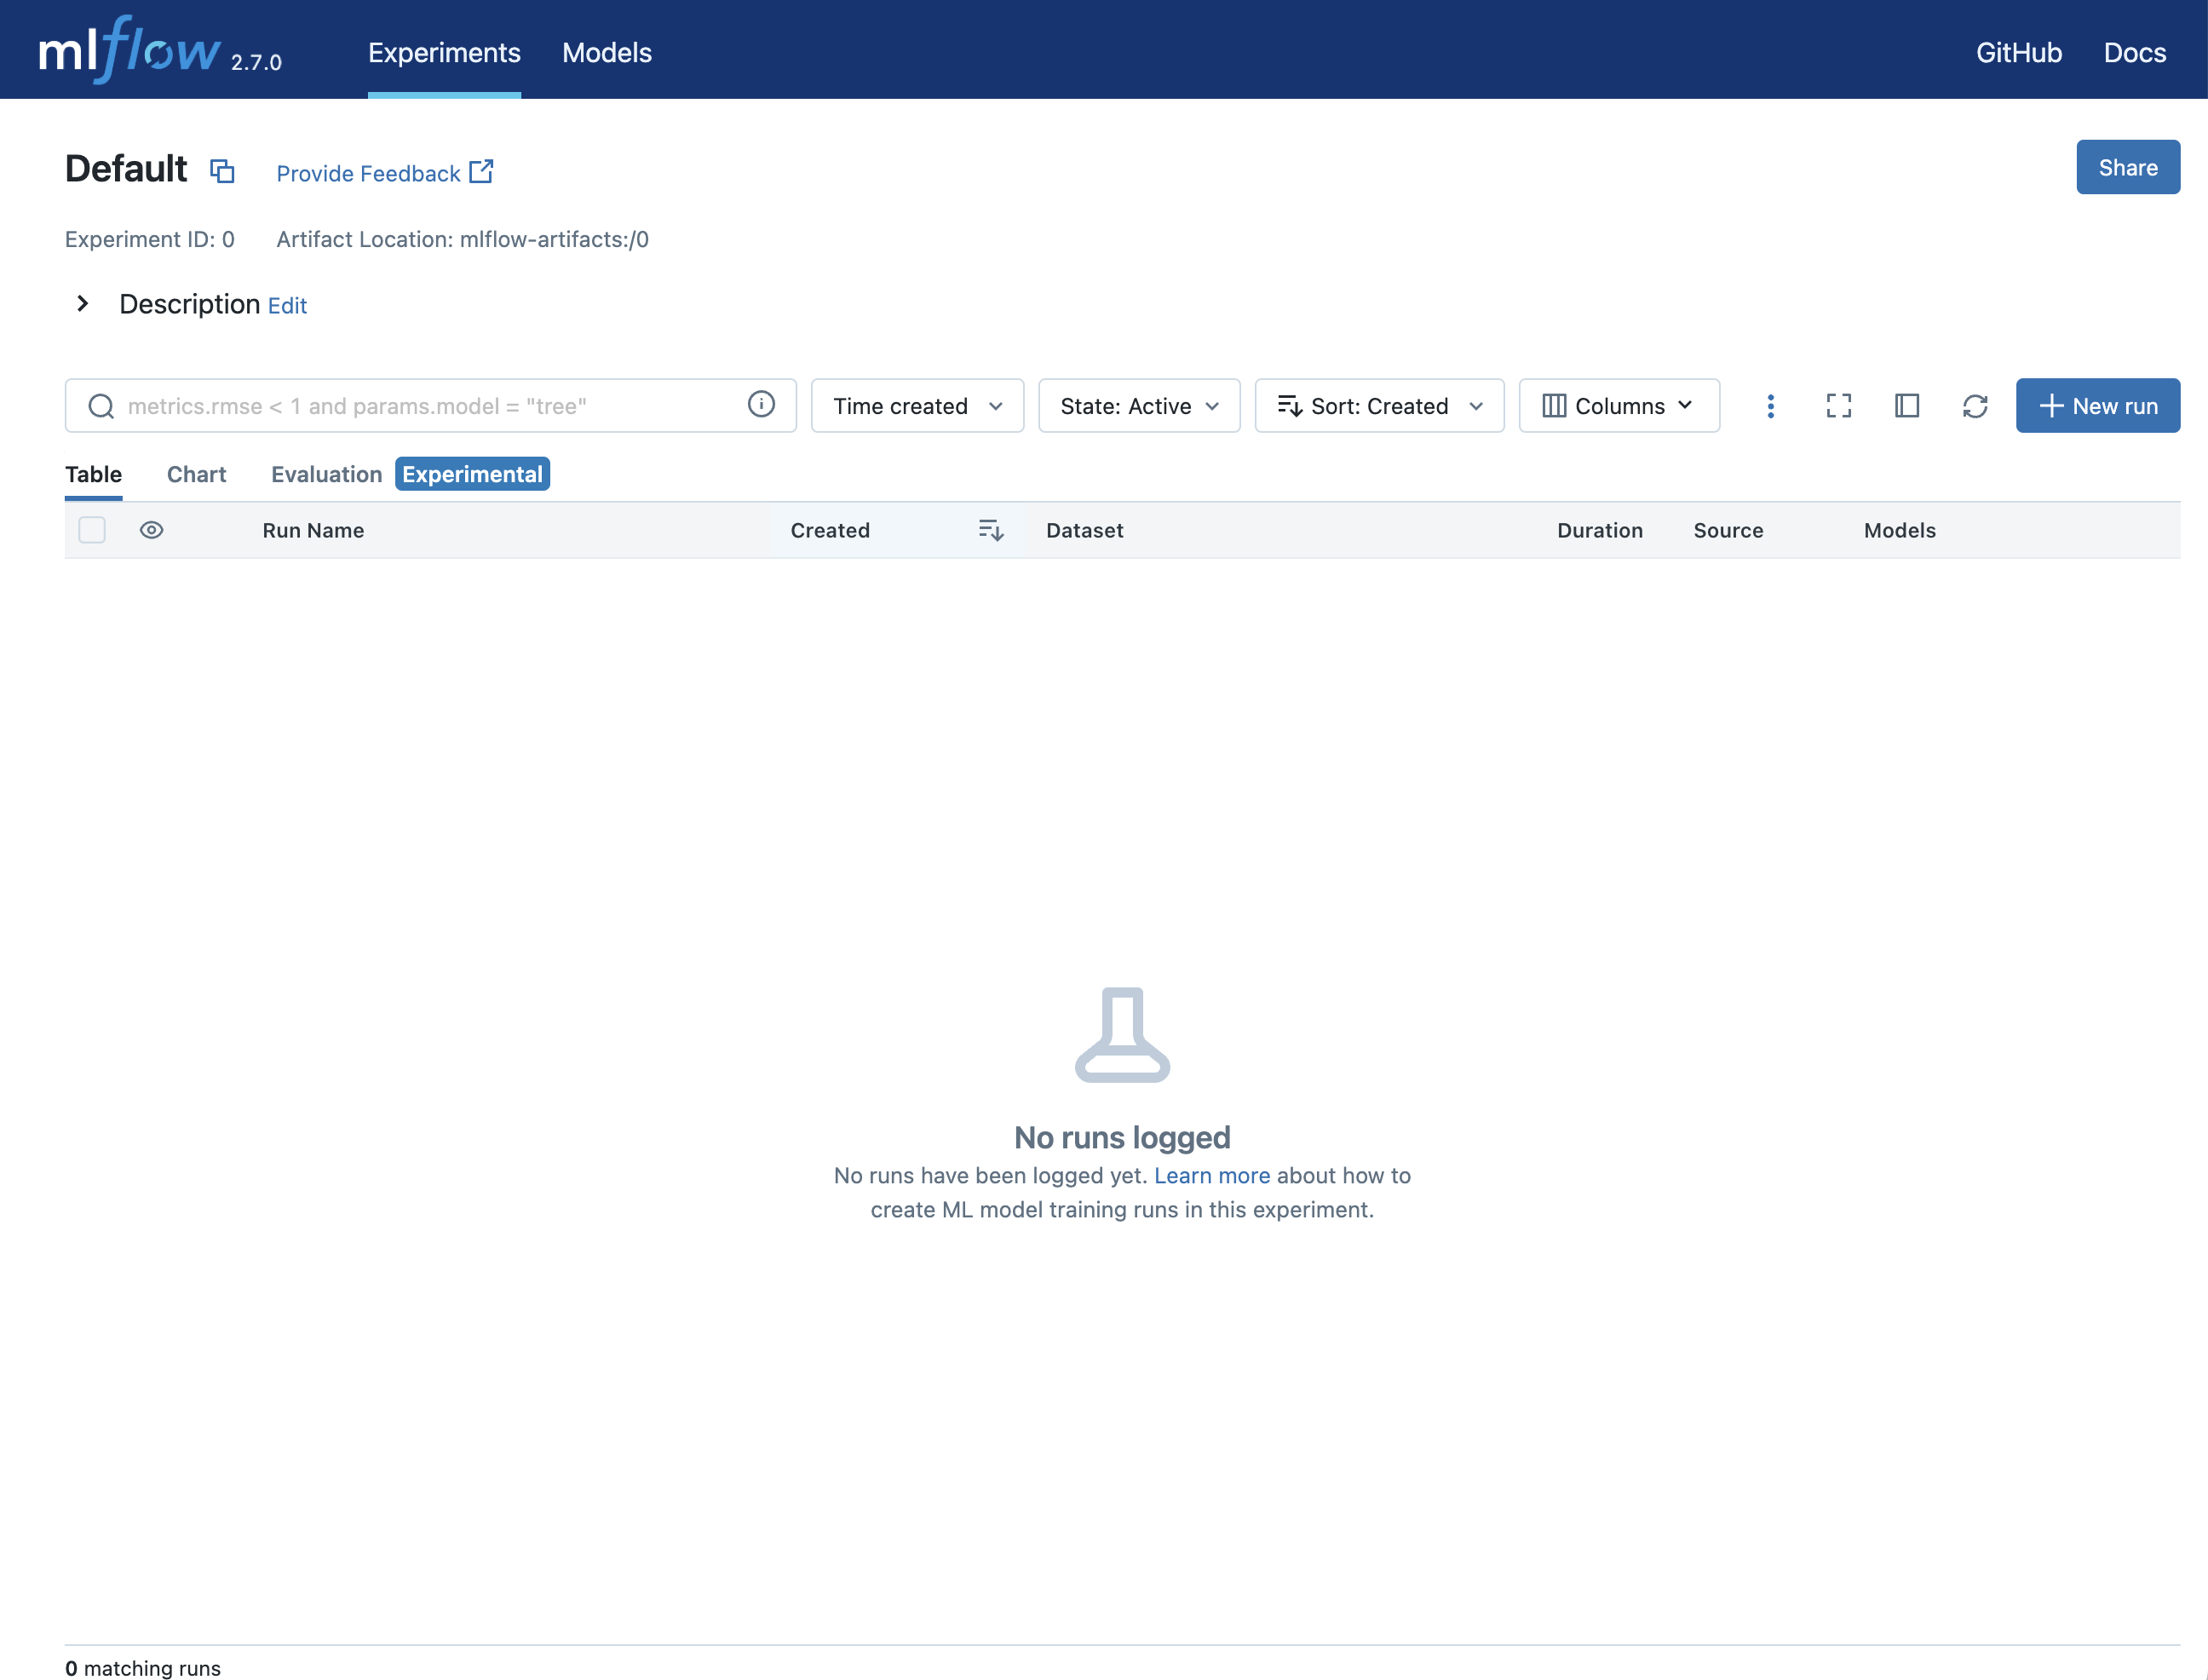
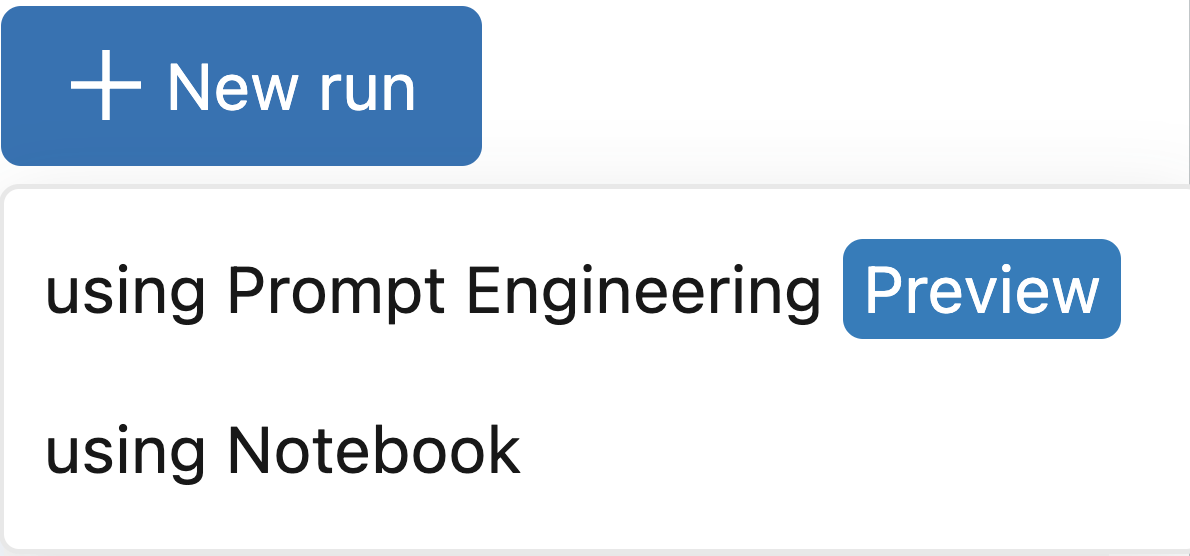
Step 4: Create a run with prompt engineering
Once you have opened the Experiment, click the New Run button and select using Prompt Engineering. This will open the prompt engineering playground where you can try out different LLMs, parameters, and prompts.
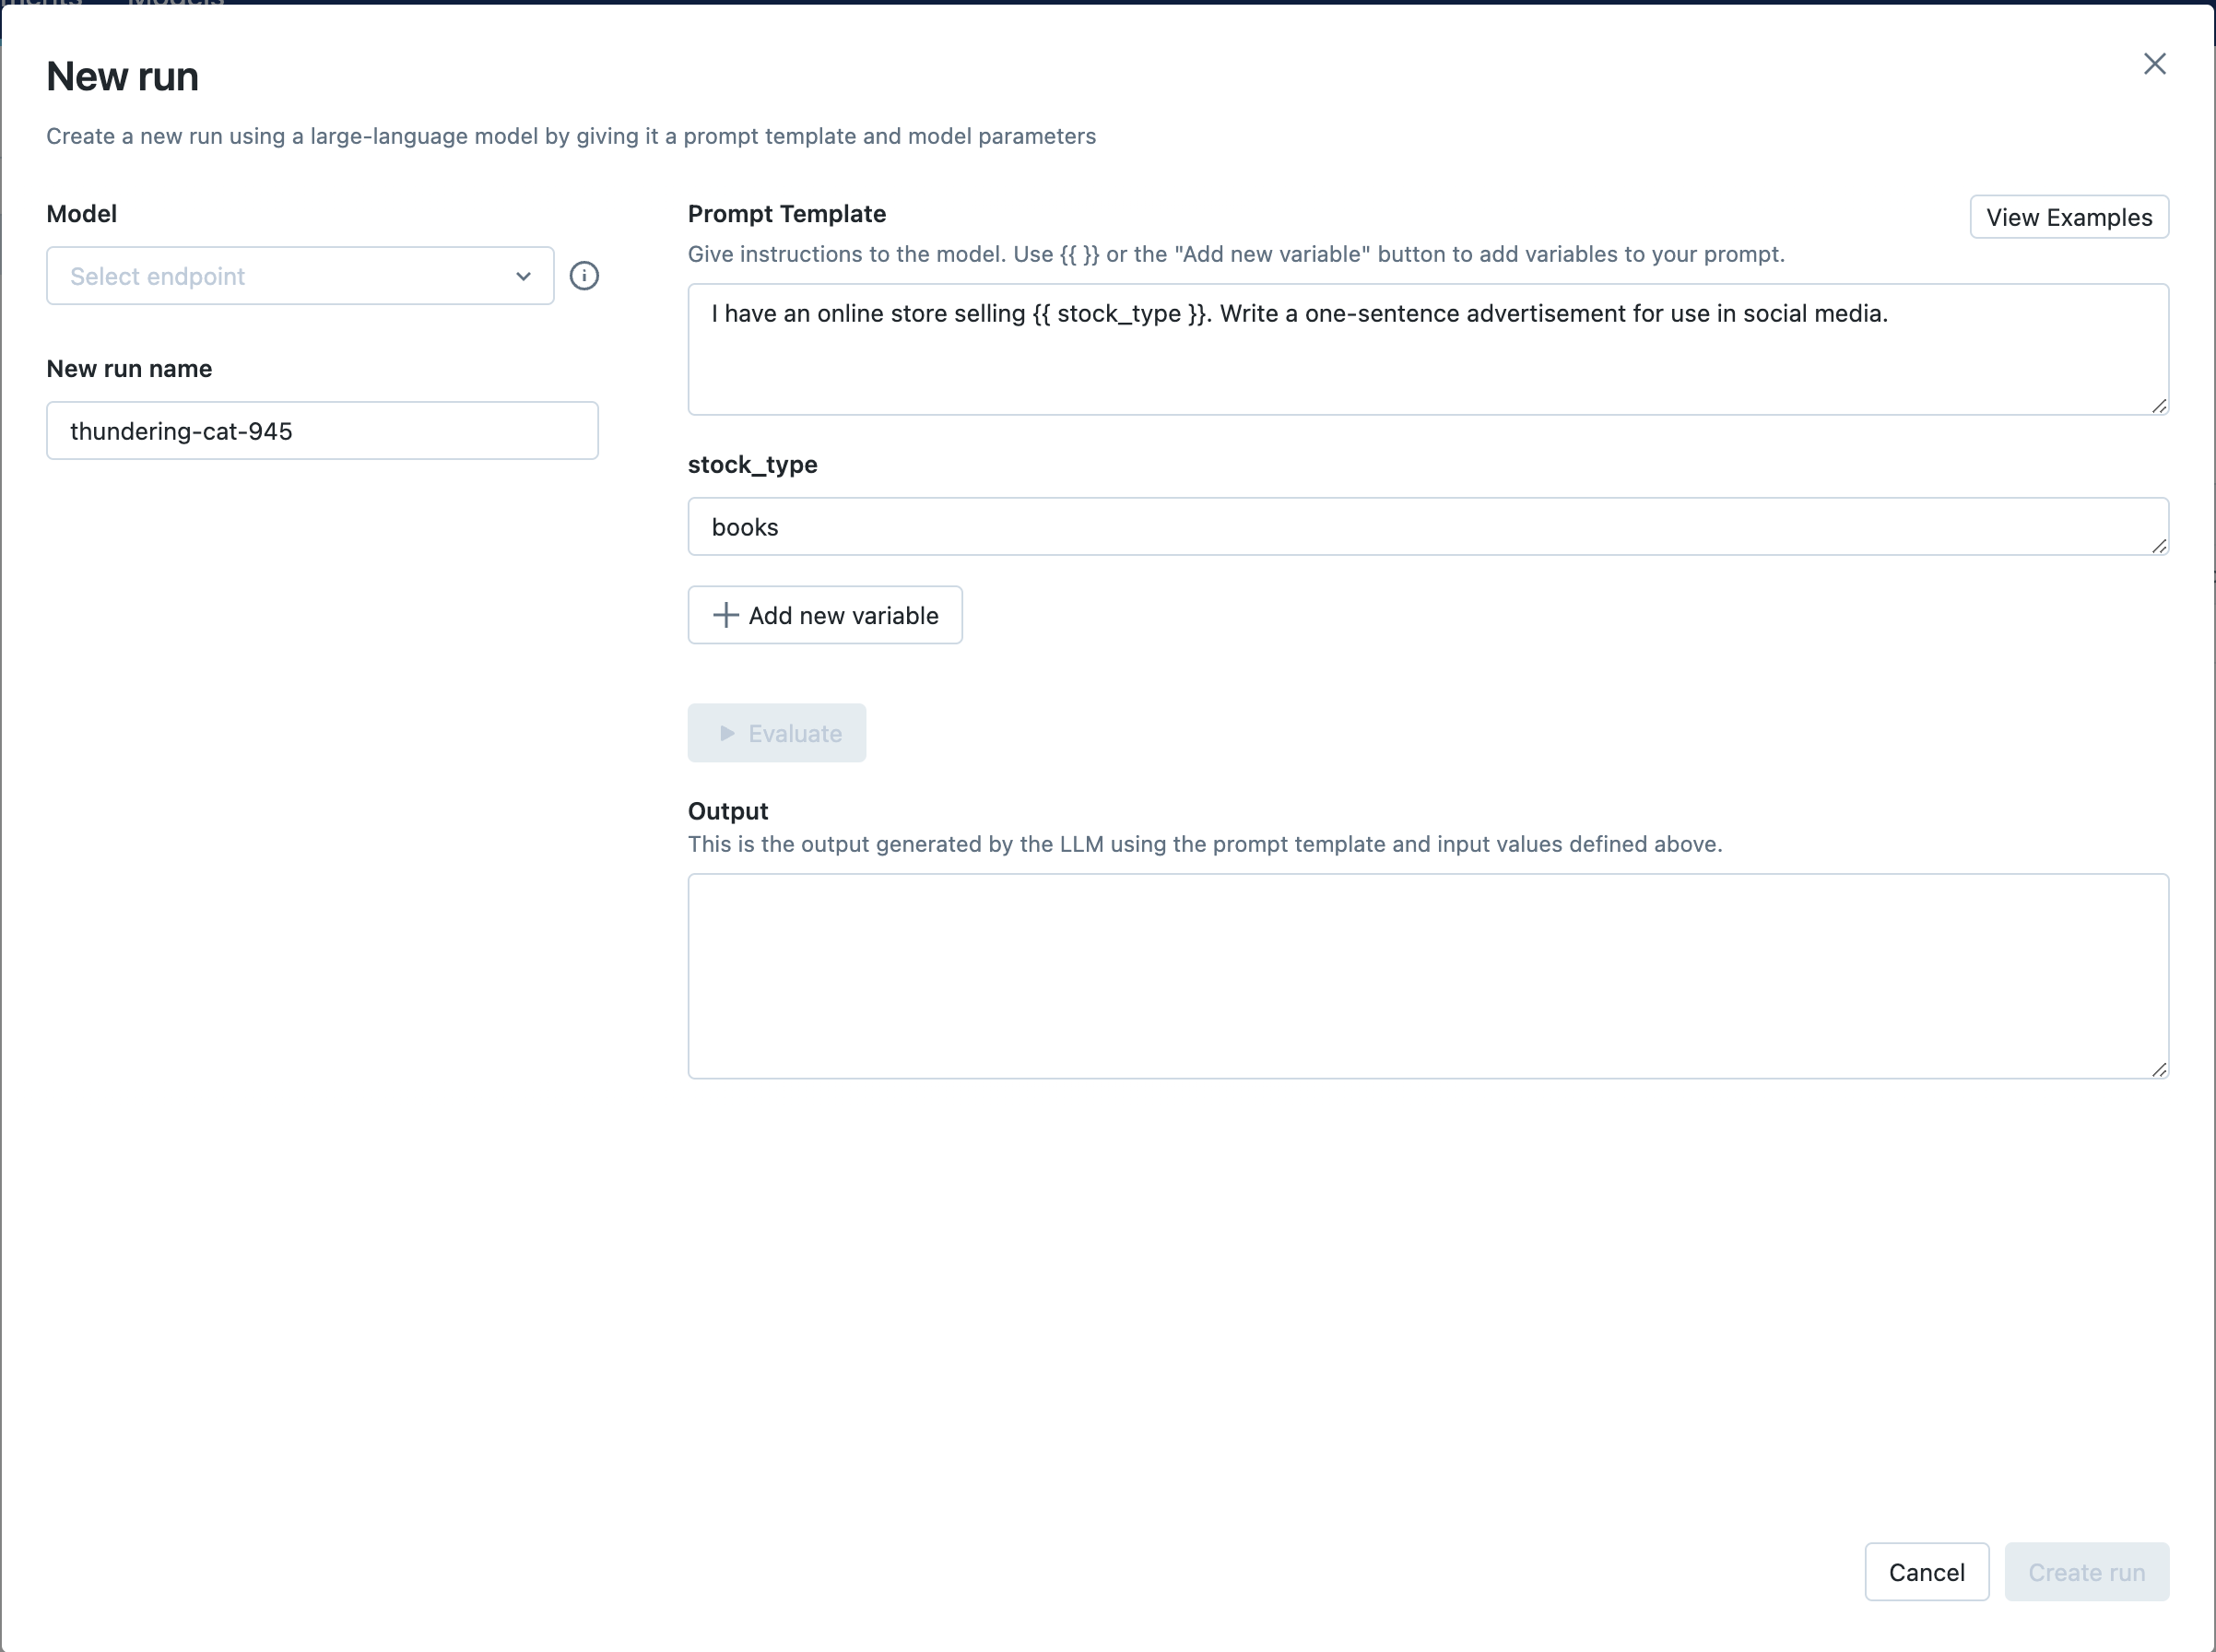
Step 5: Select your endpoint and evaluate the example prompt
Next, click the Select endpoint dropdown and select the MLflow AI Gateway completions endpoint you created in Step 1. Then, click the Evaluate button to test out an example prompt engineering use case for generating product advertisements.
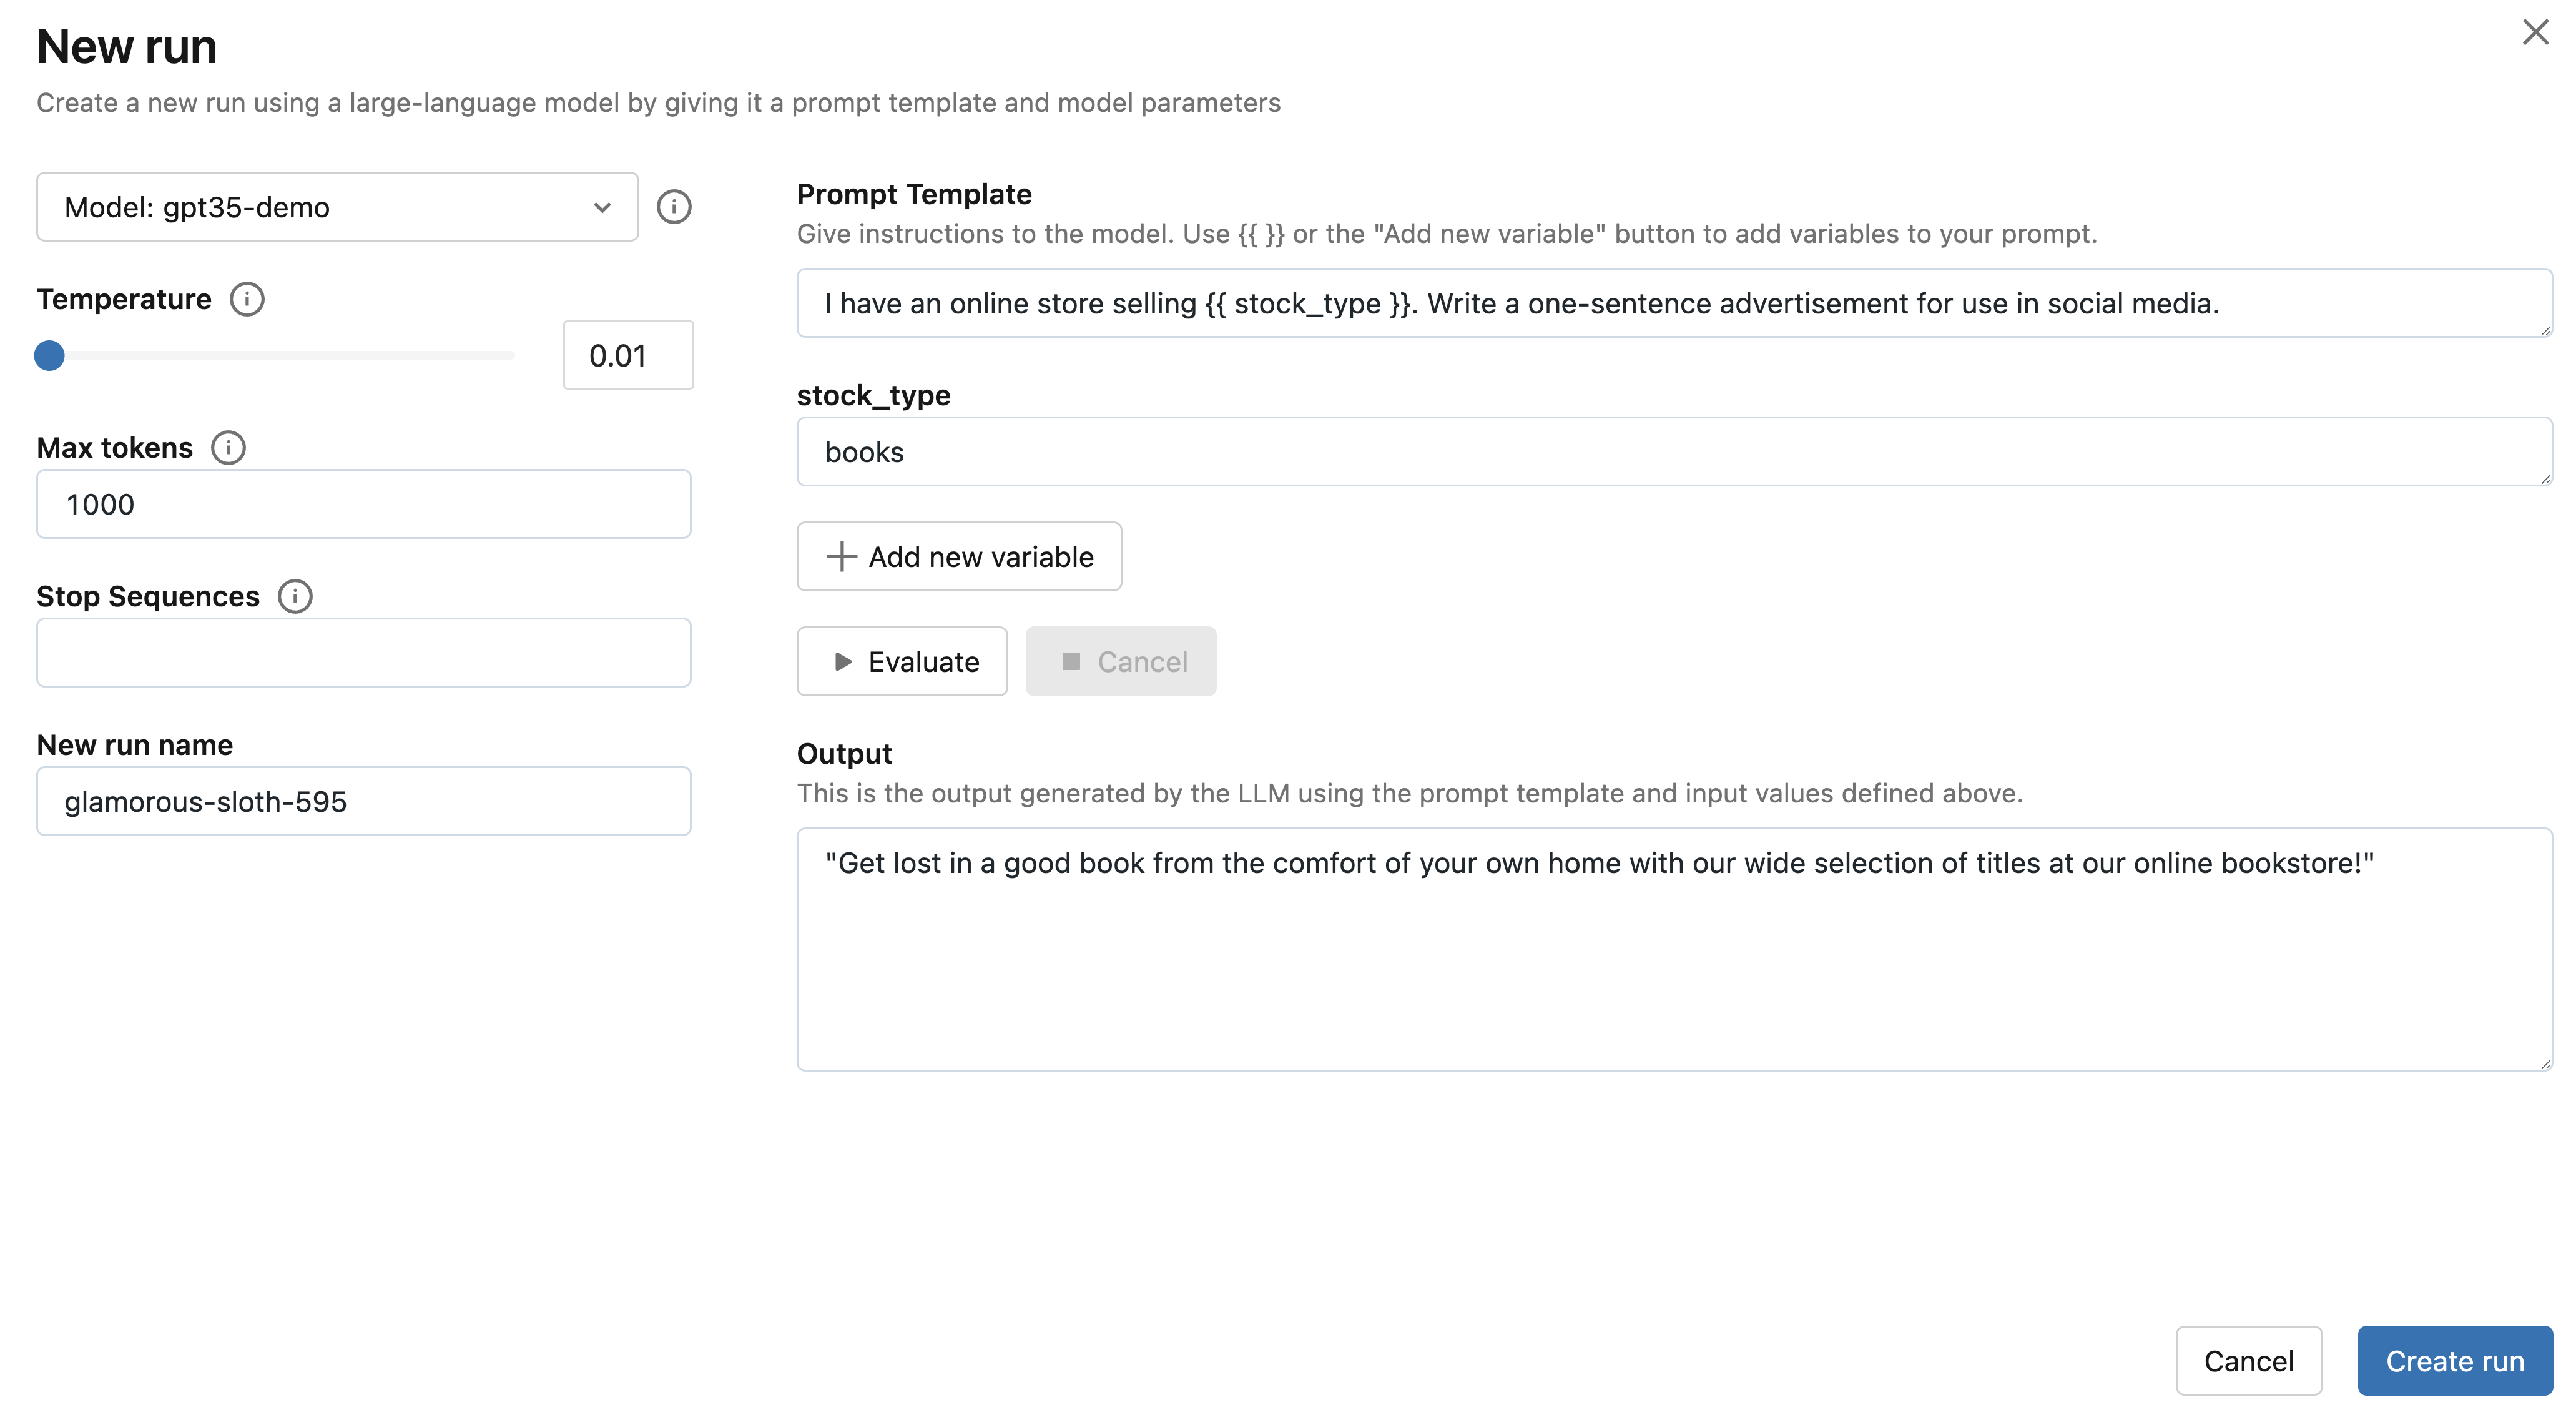
MLflow will embed the specified stock_type input
variable value - "books" - into the specified prompt template and send it to the LLM
associated with the MLflow AI Gateway endpoint with the configured temperature (currently 0.01)
and max_tokens (currently 1000). The LLM response will appear in the Output section.
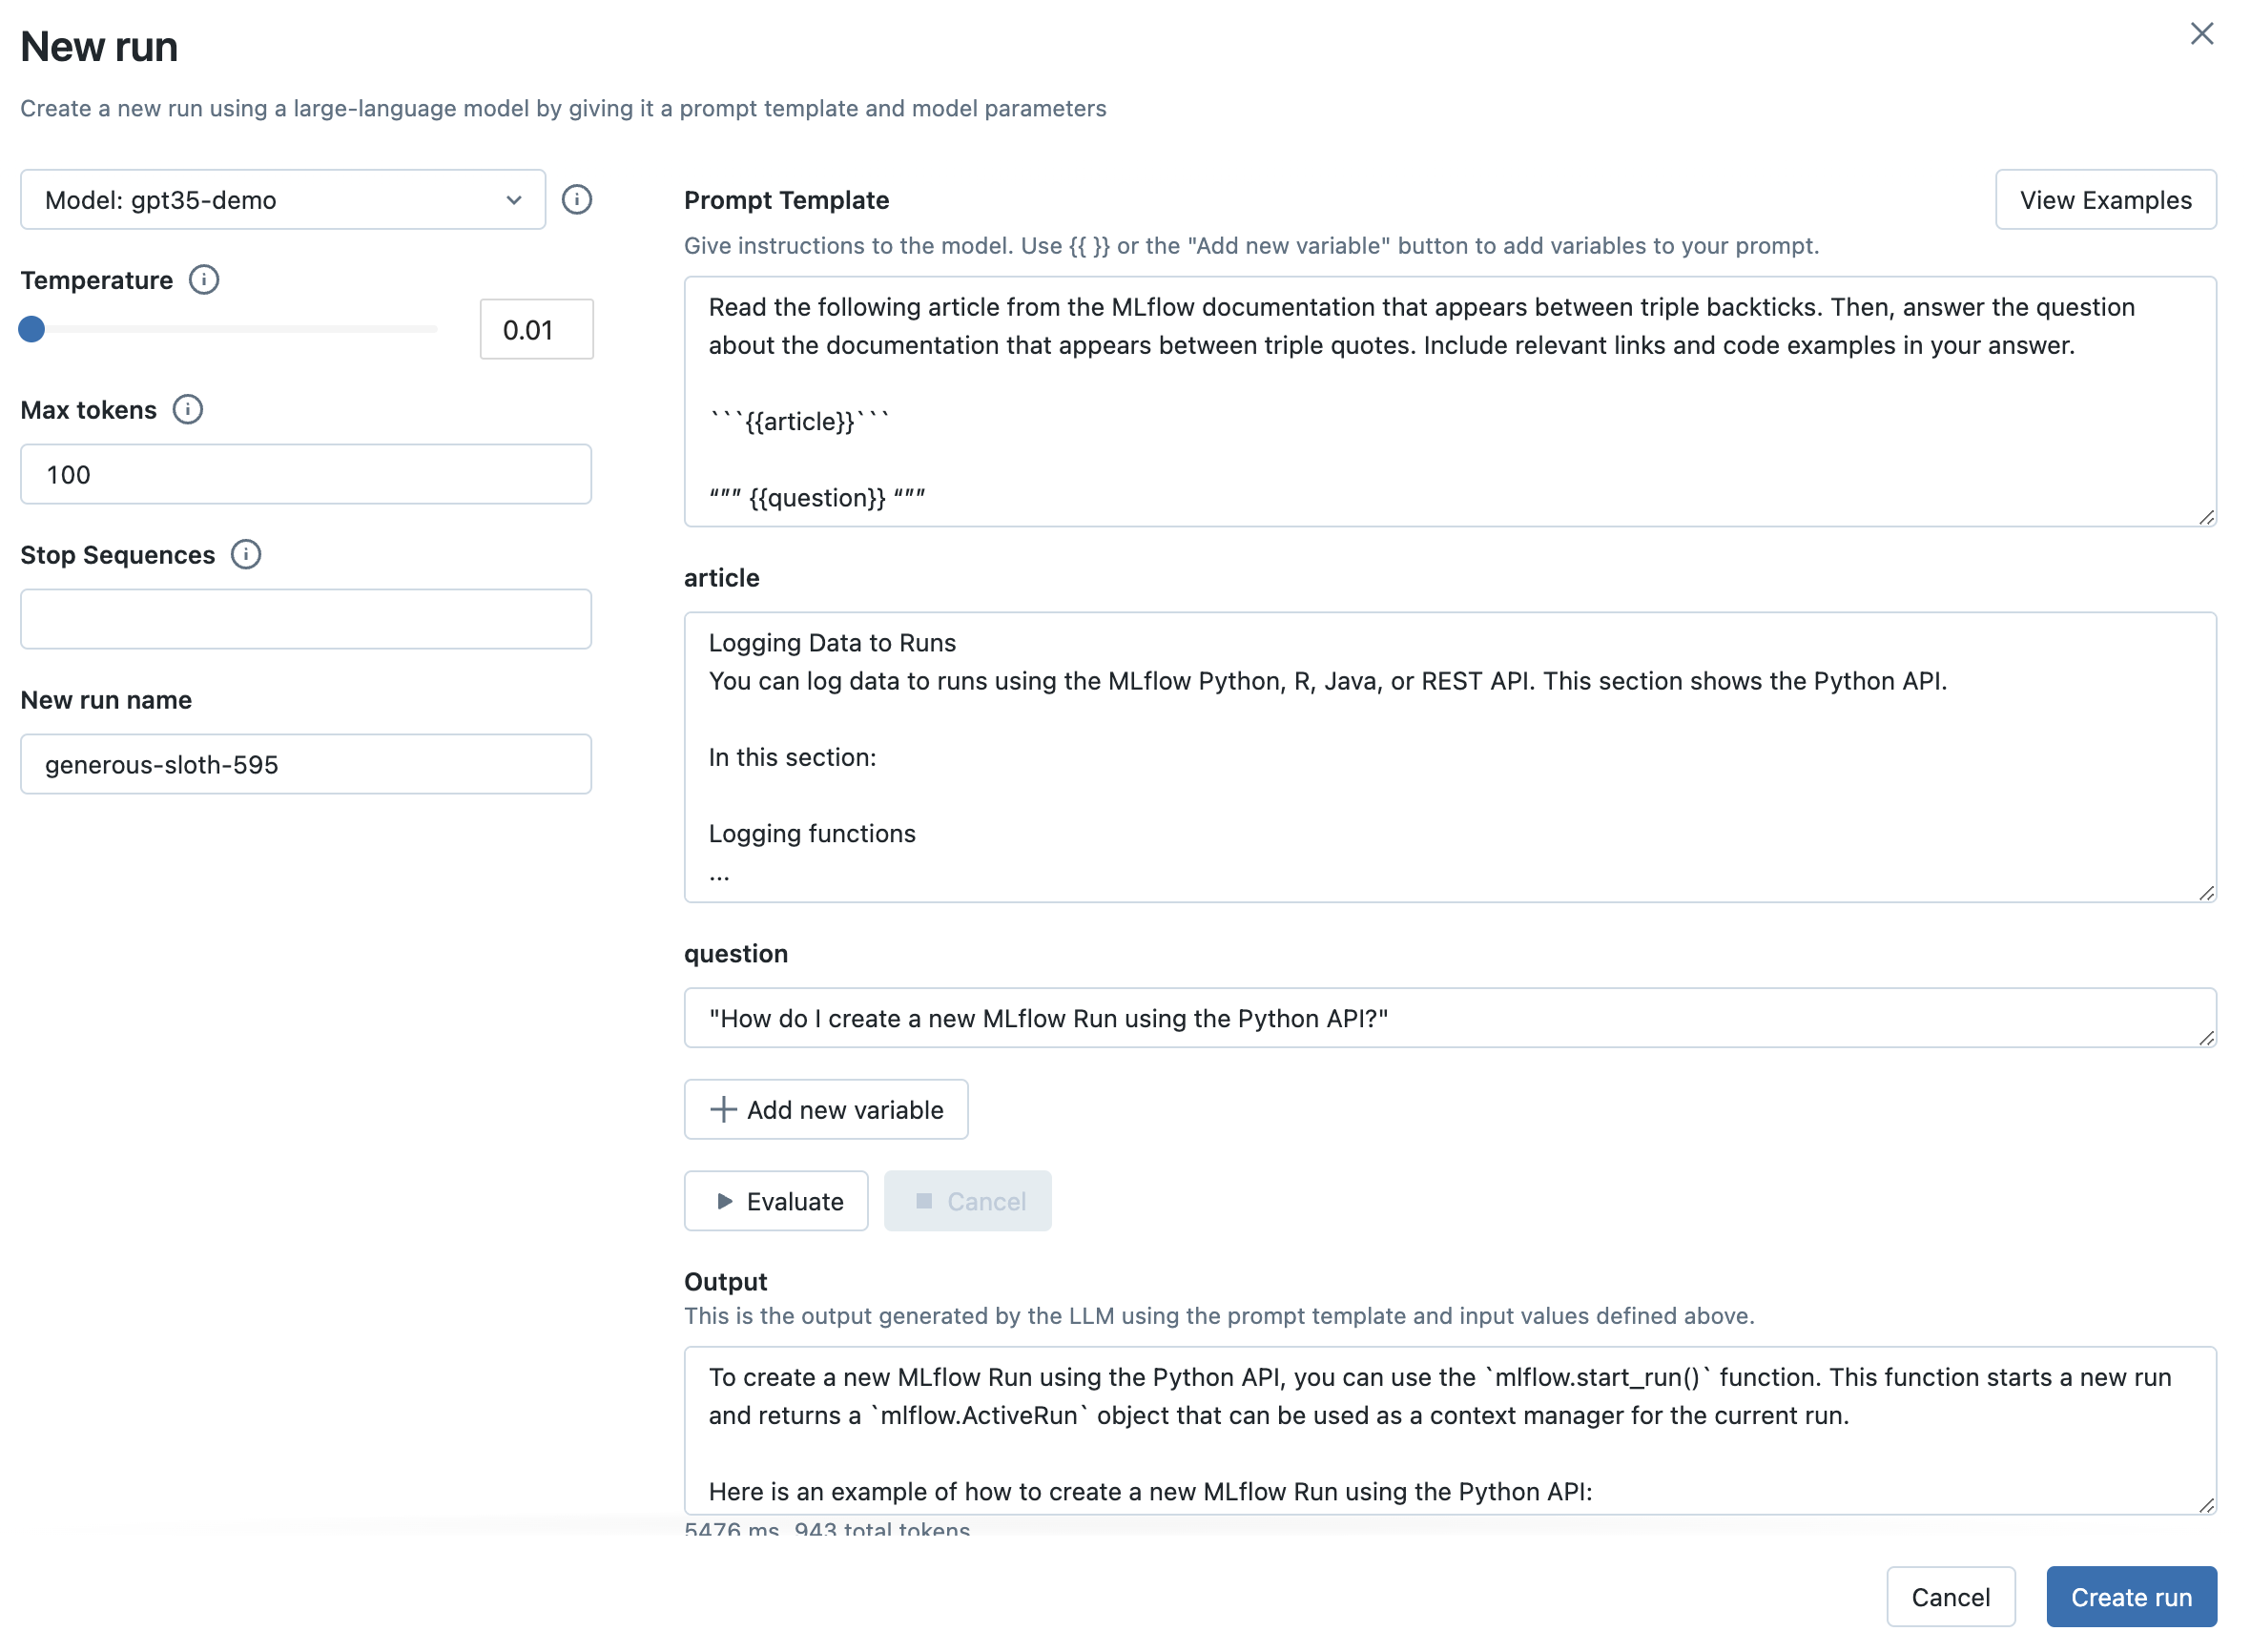
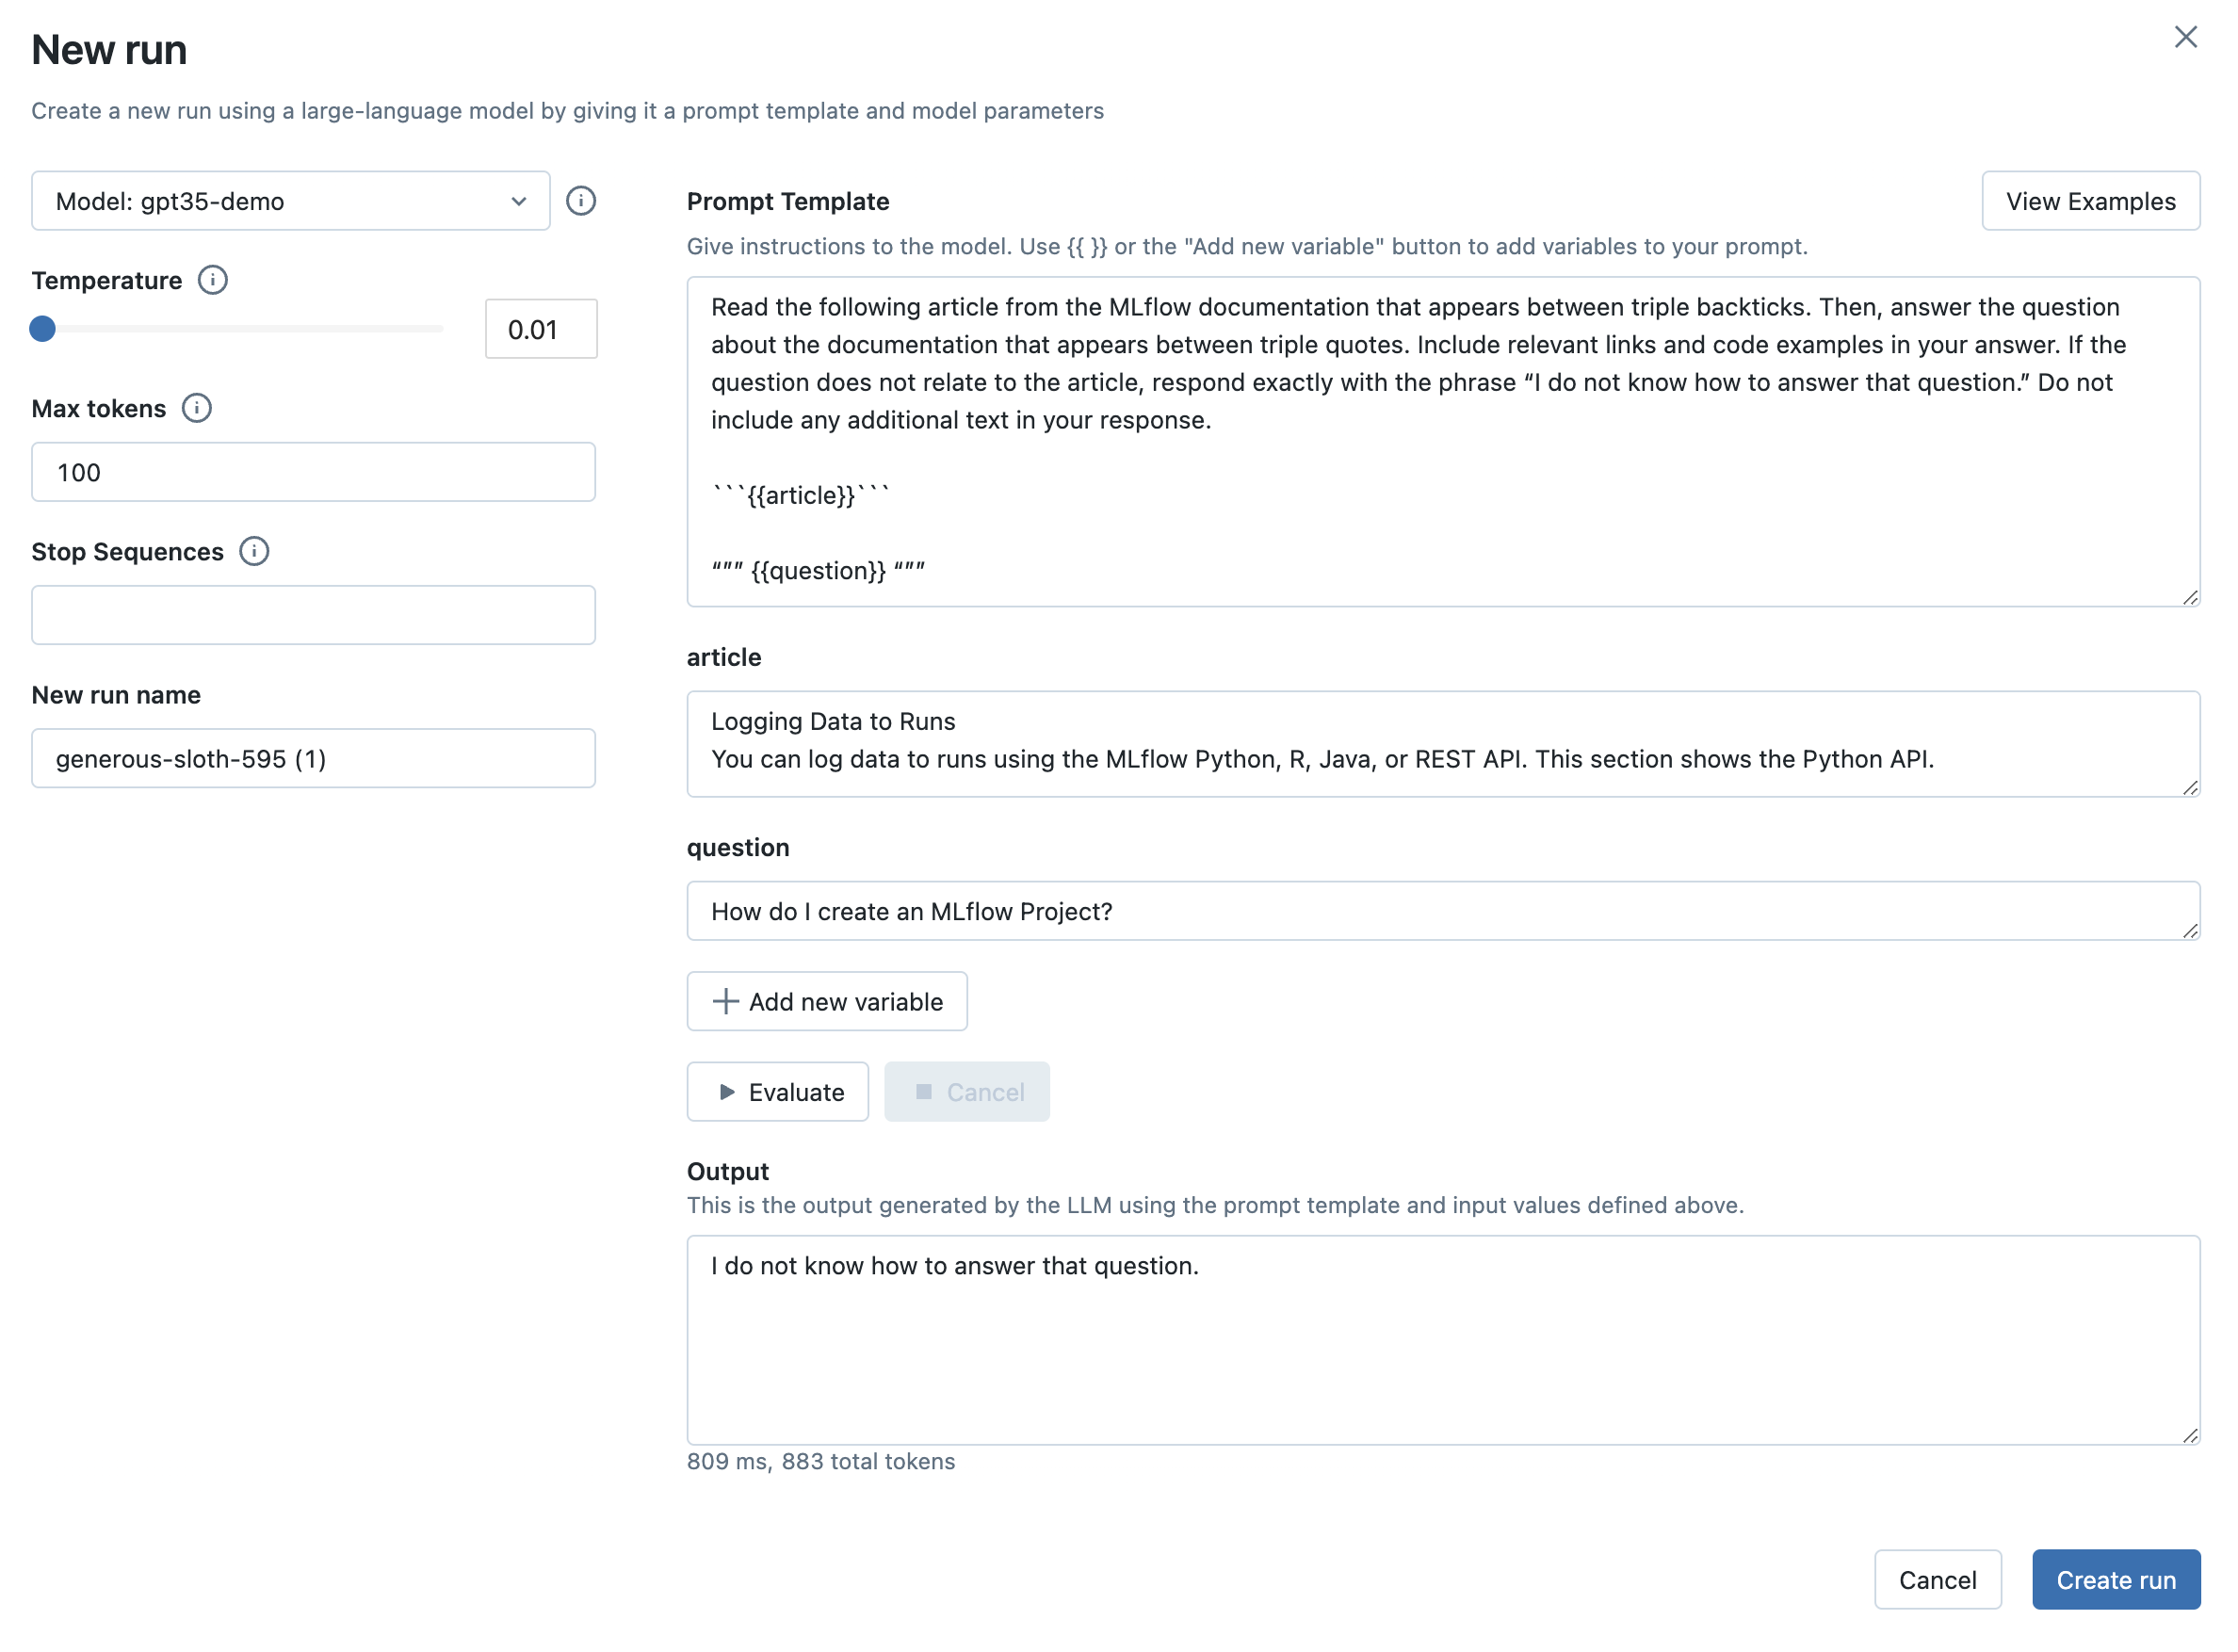
Step 6: Try a prompt of your choosing
Replace the prompt template from the previous step with a prompt template of your choosing. Prompts can define multiple variables. For example, you can use the following prompt template to instruct the LLM to answer questions about the MLflow documentation:
Read the following article from the MLflow documentation that appears between triple
backticks. Then, answer the question about the documentation that appears between triple quotes.
Include relevant links and code examples in your answer.

```{{article}}```

"""
{{question}}
"""
Then, fill in the input variables. For example, in the MLflow documentation
use case, the article input variable can be set to the contents of
https://mlflow.org/docs/latest/tracking.html#logging-data-to-runs and the question input variable
can be set to "How do I create a new MLflow Run using the Python API?".
Finally, click the Evaluate button to see the new output. You can also try choosing a larger value of temperature to observe how the LLM’s output changes.
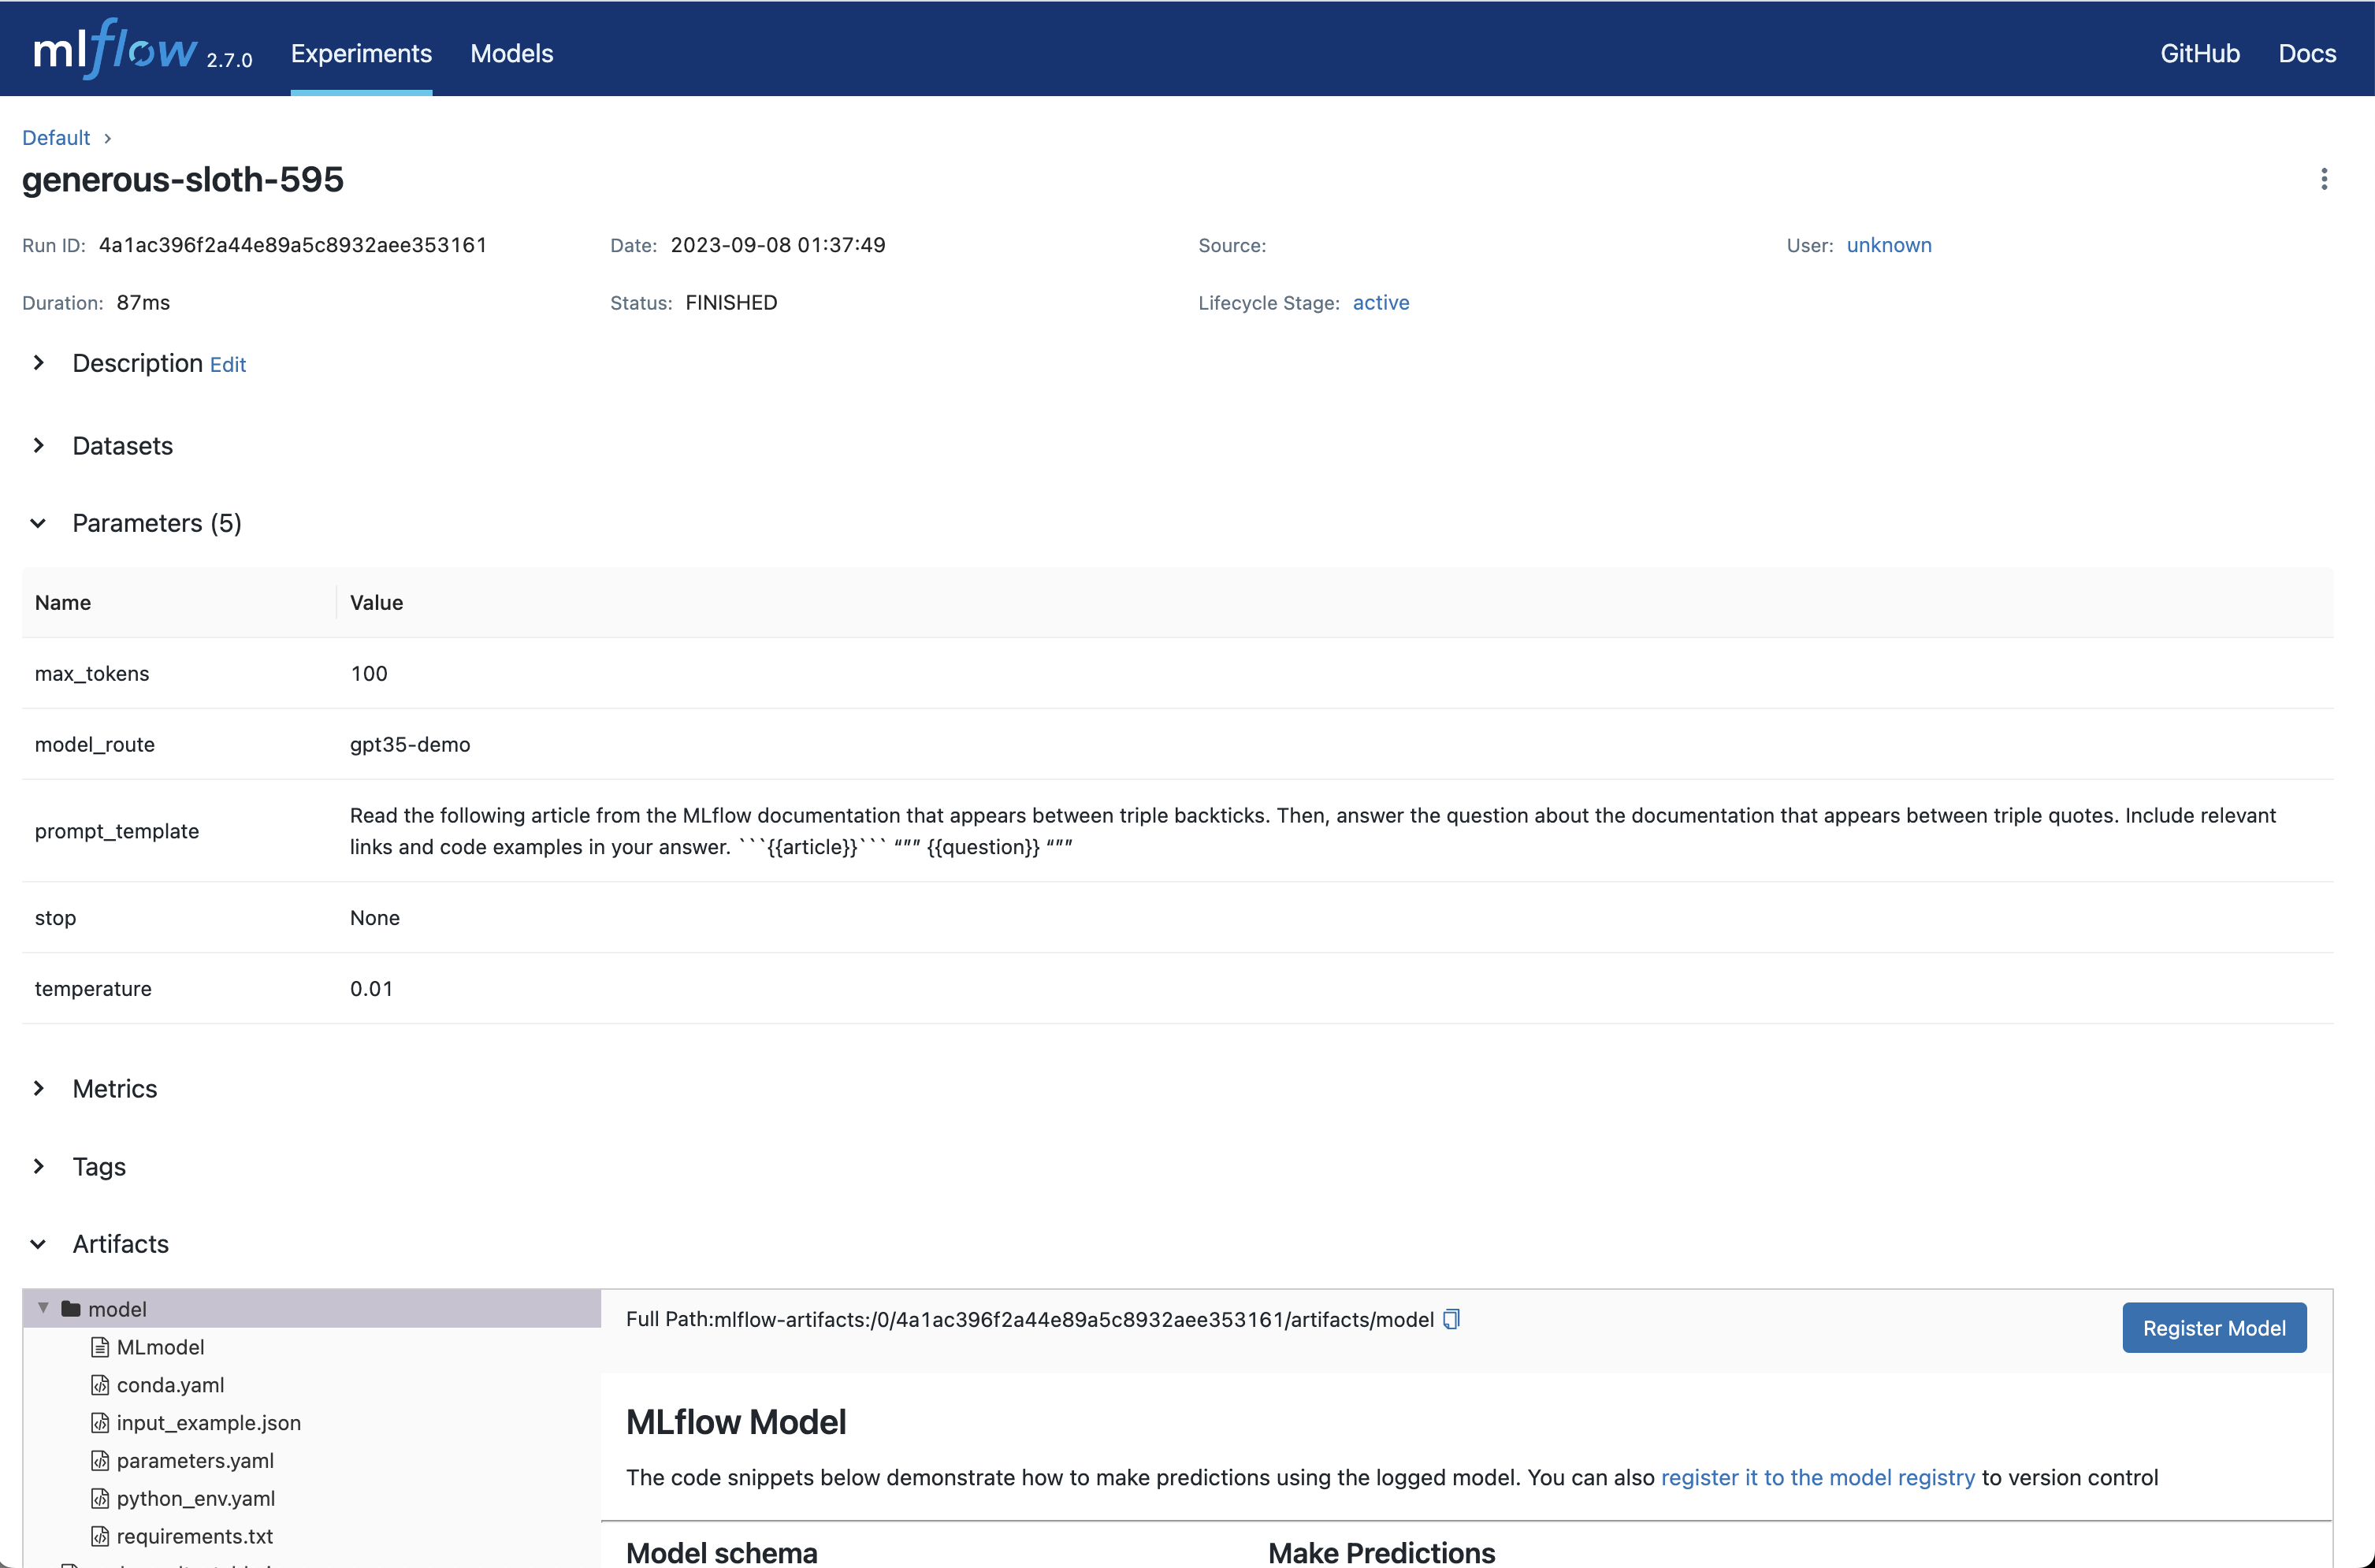
Step 7: Capture your choice of LLM, prompt template, and parameters as an MLflow Run
Once you’re satisfied with your chosen prompt template and parameters, click the Create Run button to store this information, along with your choice of LLM, as an MLflow Run. This will create a new Run with the prompt template, parameters, and choice of LLM stored as Run params. It will also automatically create an MLflow Model with this information that can be used for batch or real-time inference.
To view this information, click the Run name to open the Run page:
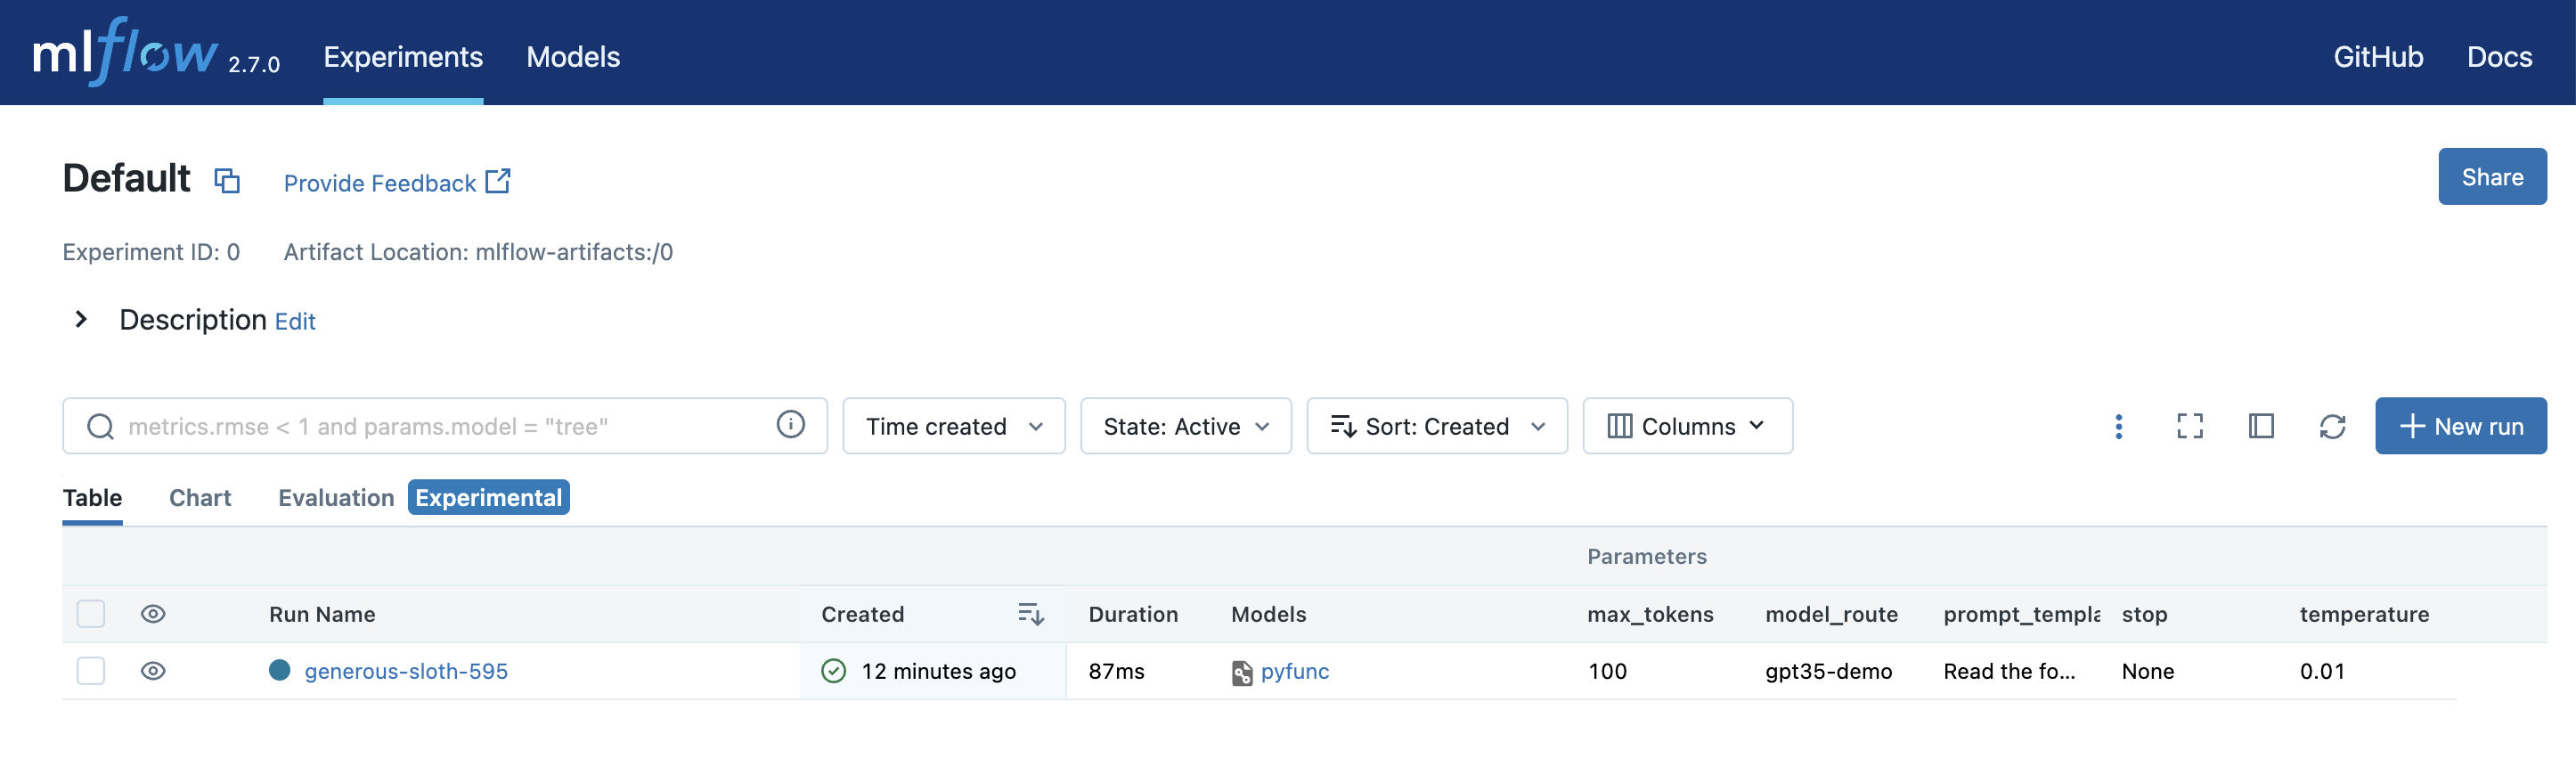
You can also see the parameters and compare them with other configurations by opening the Table view tab:
After your Run is created, MLflow will open the Evaluation tab where you can see your latest playground input & output and try out additional inputs:

Step 8: Try new inputs
To test the behavior of your chosen LLM, prompt template, and parameters on a new inputs:
Click the Add Row button and fill in a value(s) your prompt template’s input variable(s). For example, in the MLflow documentation use case, you can try asking a question unrelated to MLflow to see how the LLM responds. This is important to ensure that the application is robust to irrelevant inputs.

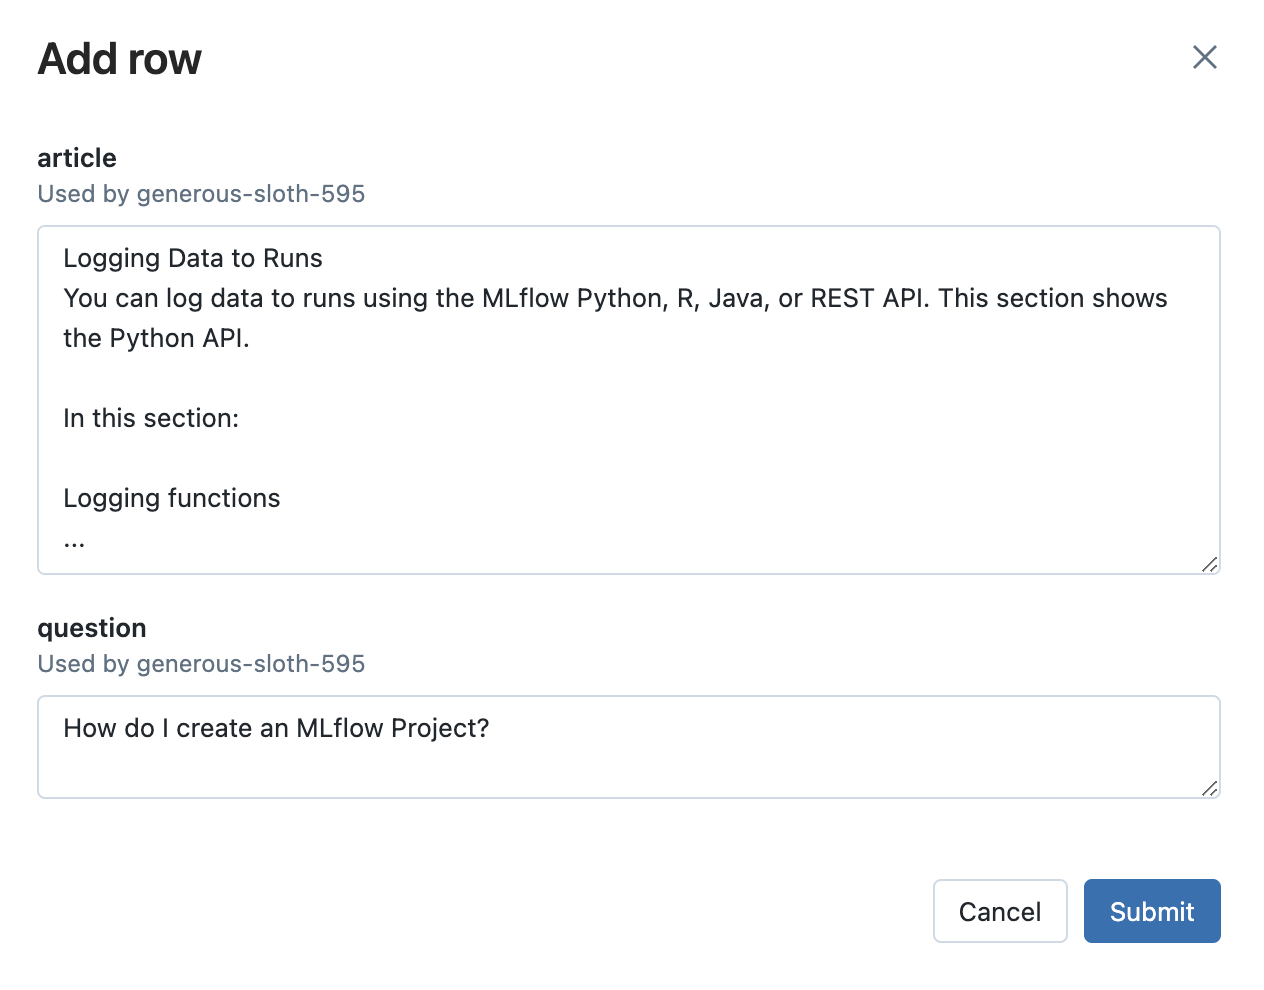
Then, click the Evaluate button to see the output.
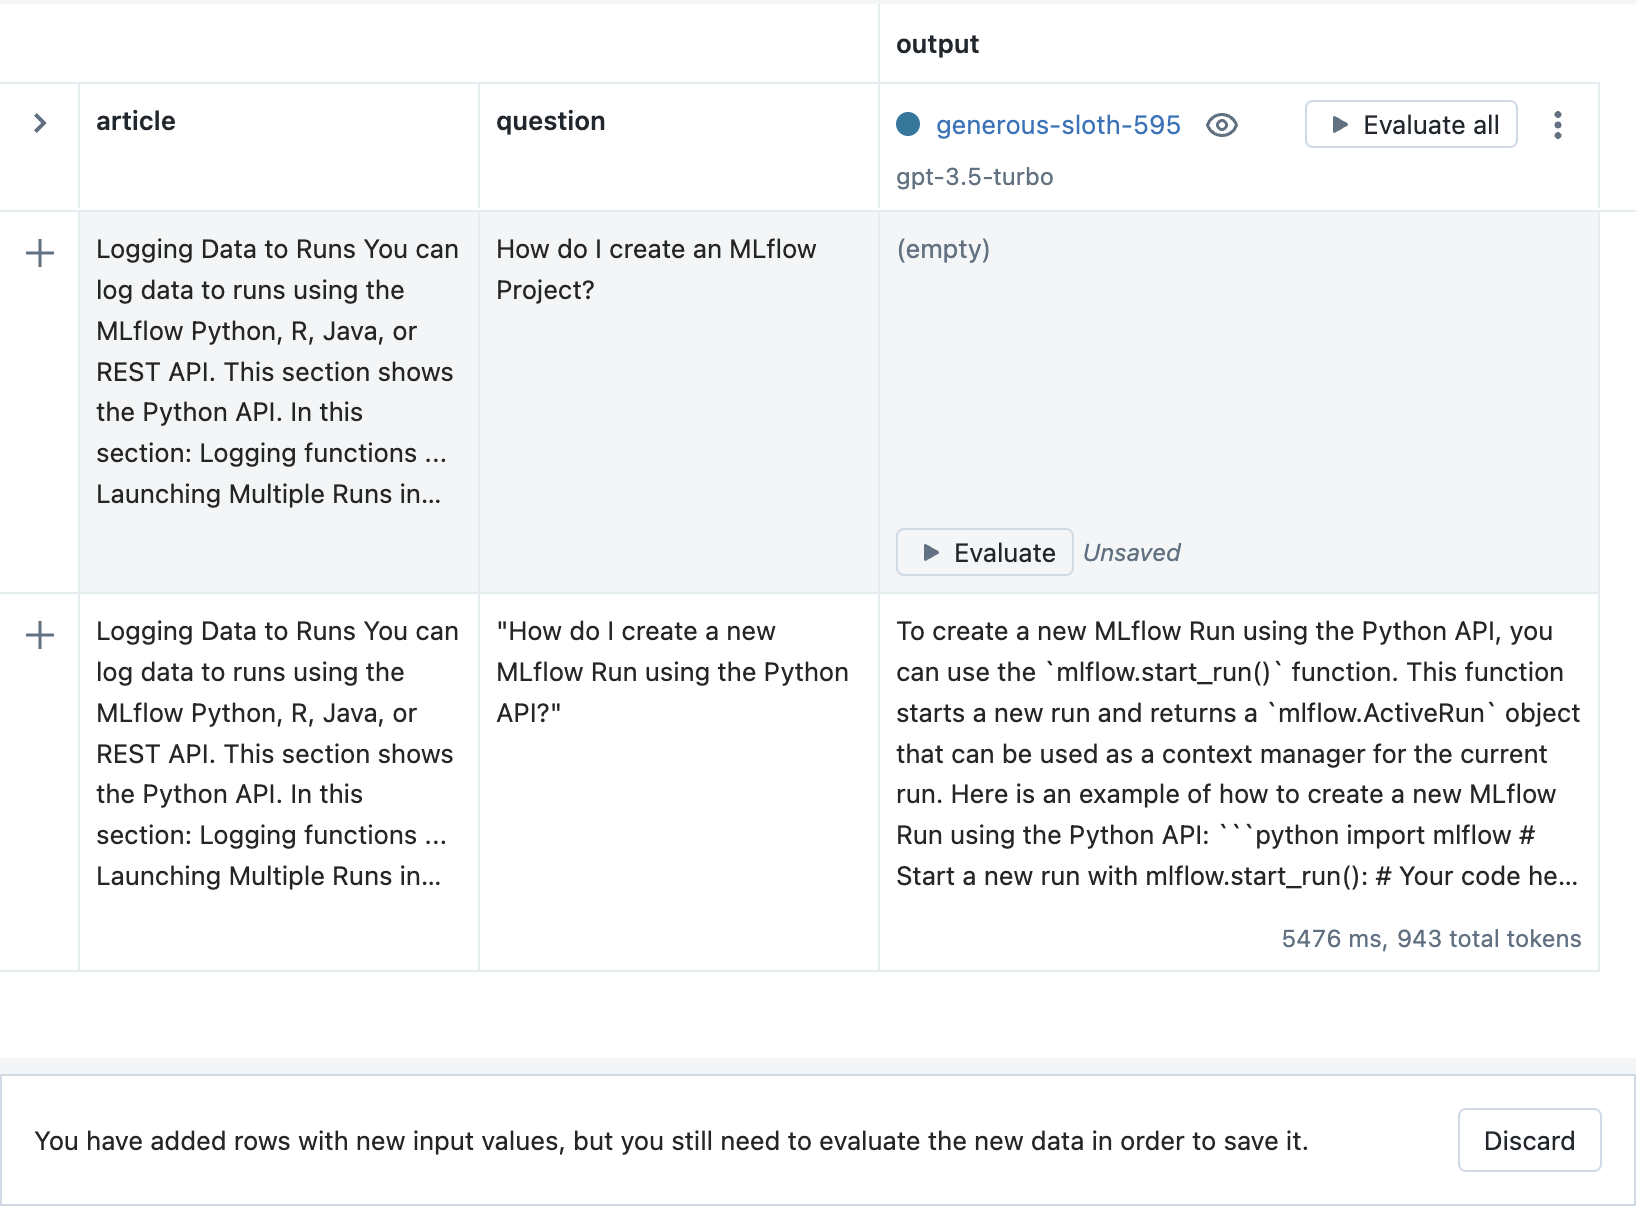
Finally, click the Save button to store the new inputs and output.
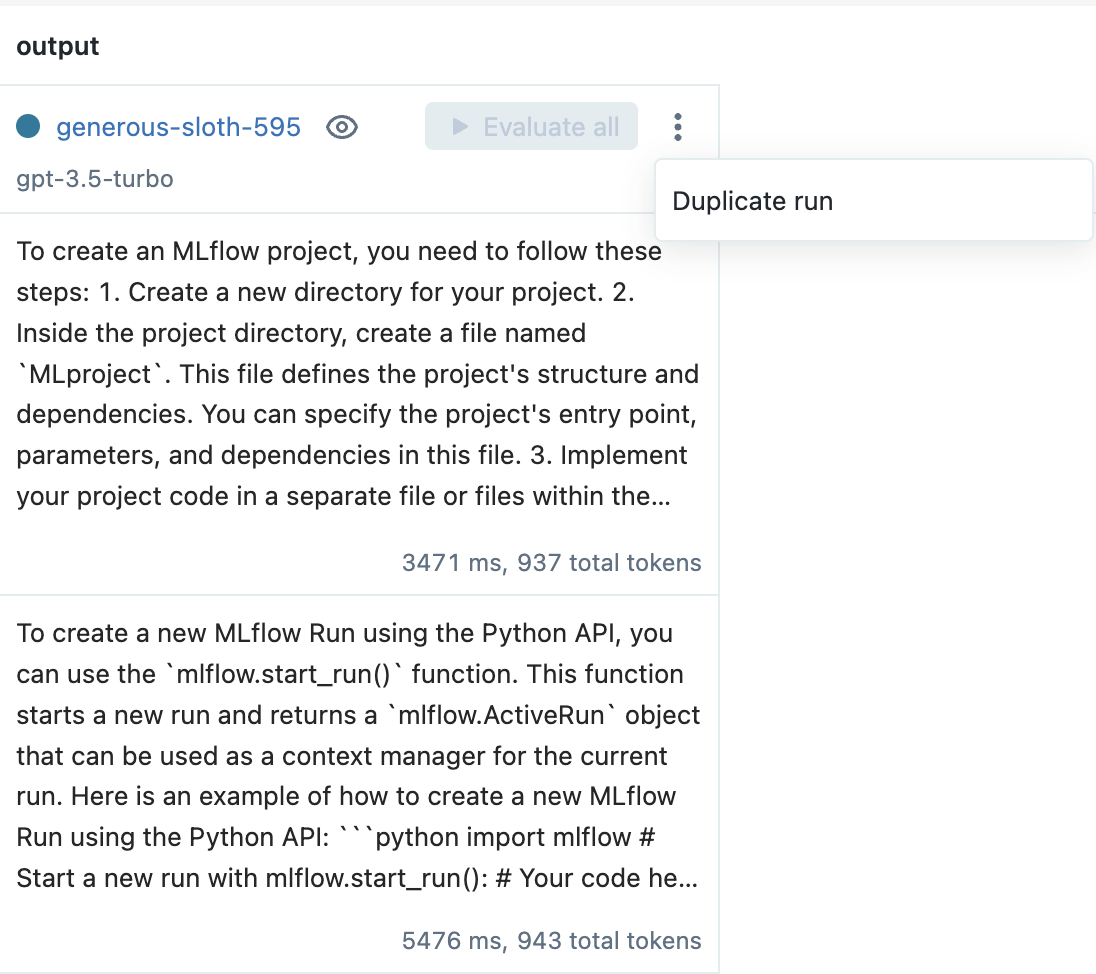
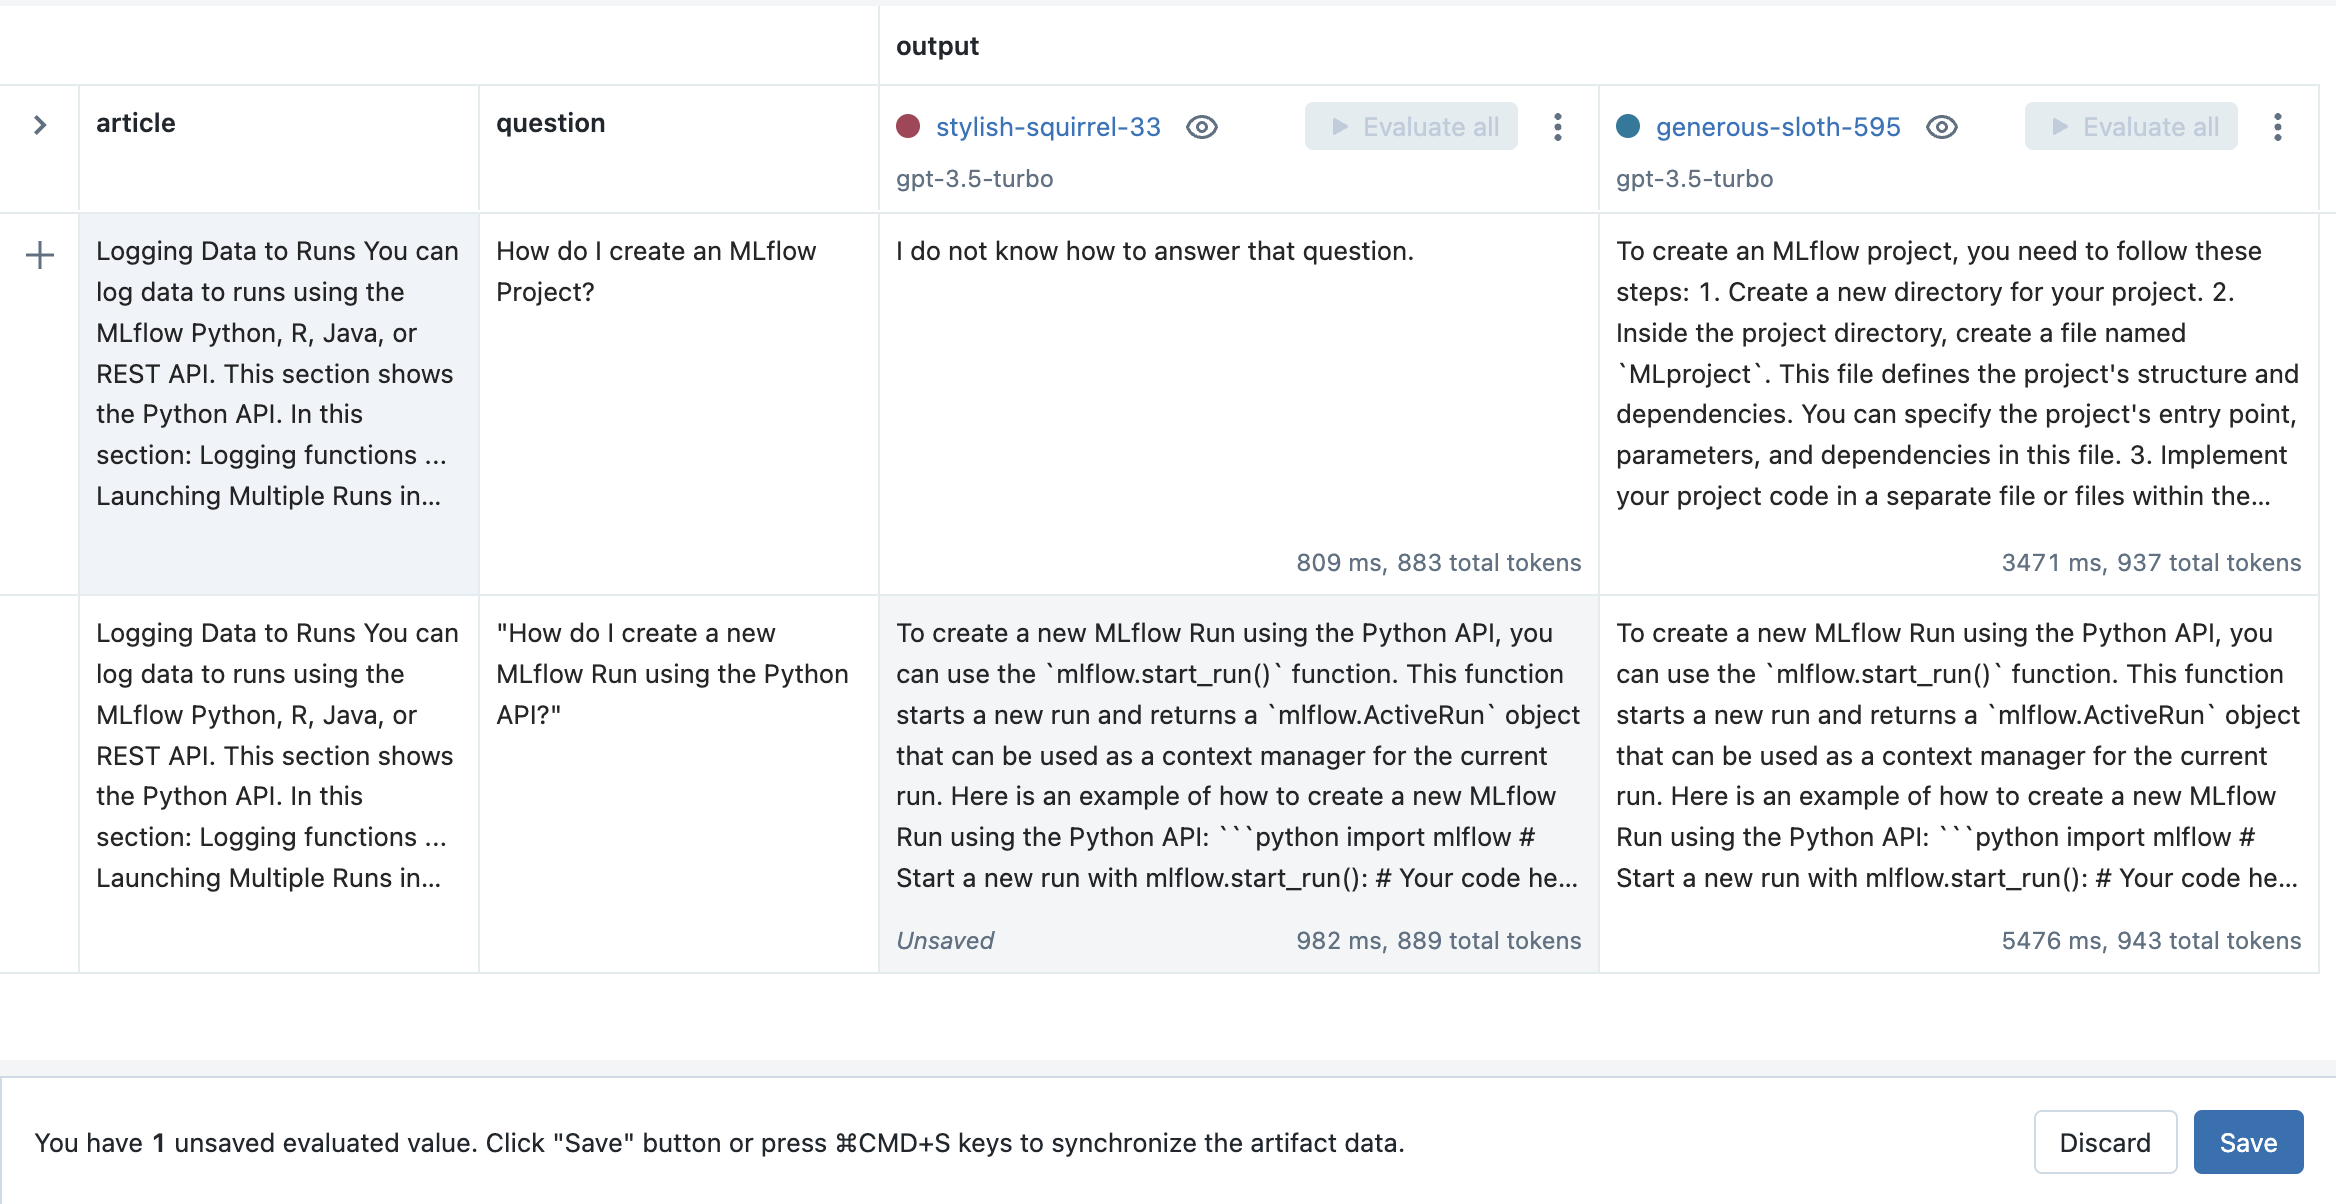
Step 9: Adjust your prompt template and create a new Run
As you try additional inputs, you might discover scenarios where your choice of LLM, prompt template, and parameters doesn’t perform as well as you would like. For example, in the MLflow documentation use case, the LLM still attempts to answer irrelevant questions about MLflow Projects even if the answer does not appear in the specified article.
To improve performance, create a new Run by selecting the Duplicate run option from the context menu. For example, in the MLflow documentation use case, adding the following text to the prompt template helps improve robustness to irrelevant questions:
If the question does not relate to the article, respond exactly with the phrase
"I do not know how to answer that question." Do not include any additional text in your
response.
Then, from the prompt engineering playground, adjust the prompt template (and / or choice of LLM and parameters), evaluate an input, and click the Create Run button to create a new Run.
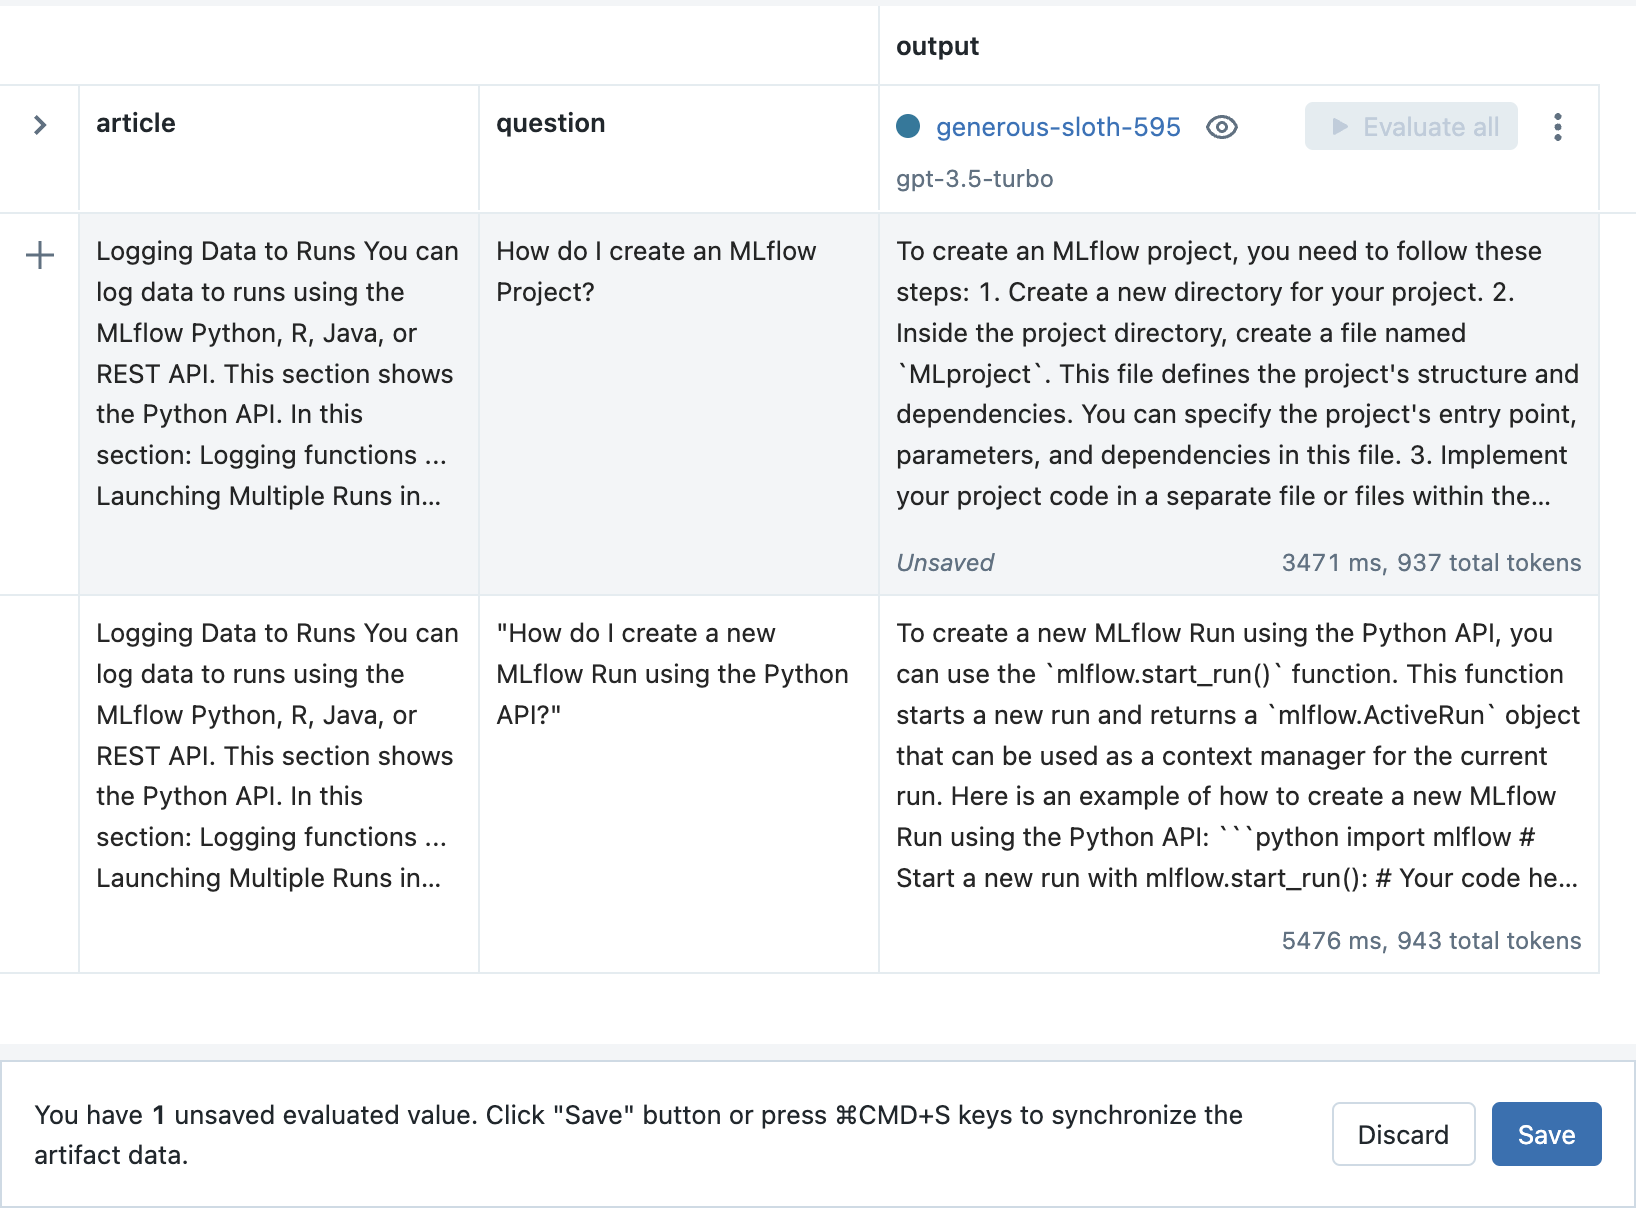
Step 10: Evaluate the new prompt template on previous inputs
Now that you’ve made an adjustment to your prompt template, it’s important to make sure that the new template performs well on the previous inputs and compare the outputs with older configurations.
From the Evaluation tab, click the Evaluate all button next to the new Run to evaluate all of the previous inputs.
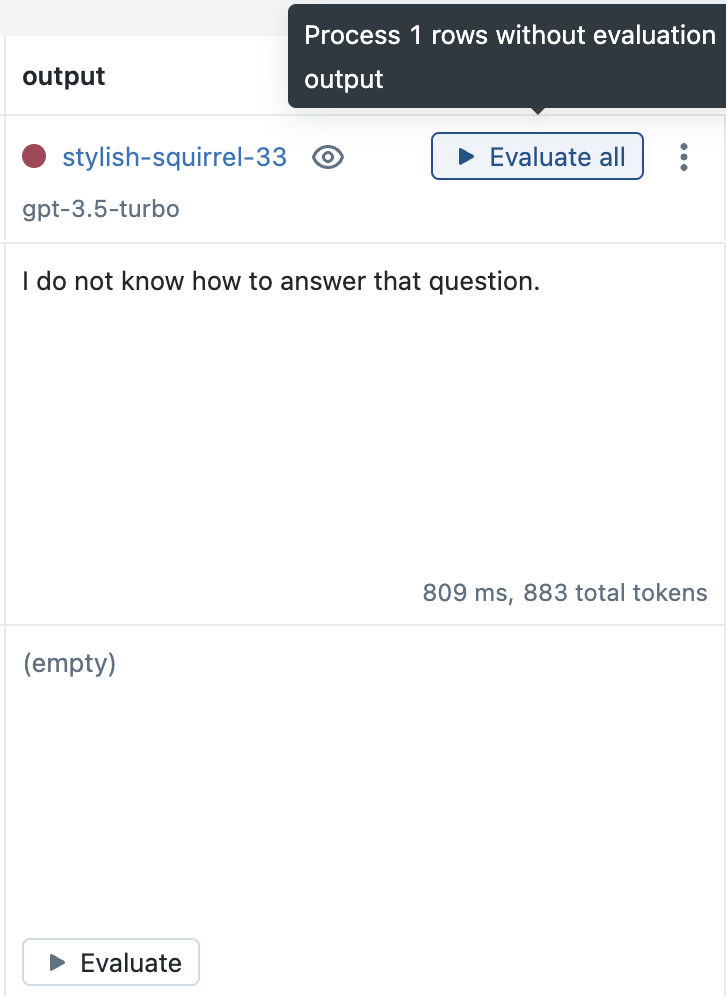
Click the Save button to store the results.
Step 11: Load evaluation data programmatically
All of the inputs and outputs produced by the MLflow prompt engineering UI and Evaluation UI are stored
as artifacts in MLflow Runs. They can be accessed programmatically using the mlflow.load_table() API
as follows:
import mlflow

mlflow.set_experiment("/Path/to/your/prompt/engineering/experiment")

# Load input and output data across all Runs (configurations) as a Pandas DataFrame
inputs_outputs_pdf = mlflow.load_table(
    # All inputs and outputs created from the MLflow UI are stored in an artifact called
    # "eval_results_table.json"
    artifact_file="eval_results_table.json",
    # Include the run ID as a column in the table to distinguish inputs and outputs
    # produced by different runs
    extra_columns=["run_id"],
)
# Optionally convert the Pandas DataFrame to Spark where it can be stored as a Delta
# table or joined with existing Delta tables
inputs_outputs_sdf = spark.createDataFrame(inputs_outputs_pdf)
Step 12: Generate predictions programmatically
Once you have found a configuration of LLM, prompt template, and parameters that performs well, you can generate predictions using the corresponding MLflow Model in a Python environment of your choosing, or you can deploy it for real-time serving.
To load the MLflow Model in a notebook for batch inference, click on the Run’s name to open the Run Page and select the model directory in the Artifact Viewer. Then, copy the first few lines of code from the Predict on a Pandas DataFrame section and run them in a Python environment of your choosing, for example:
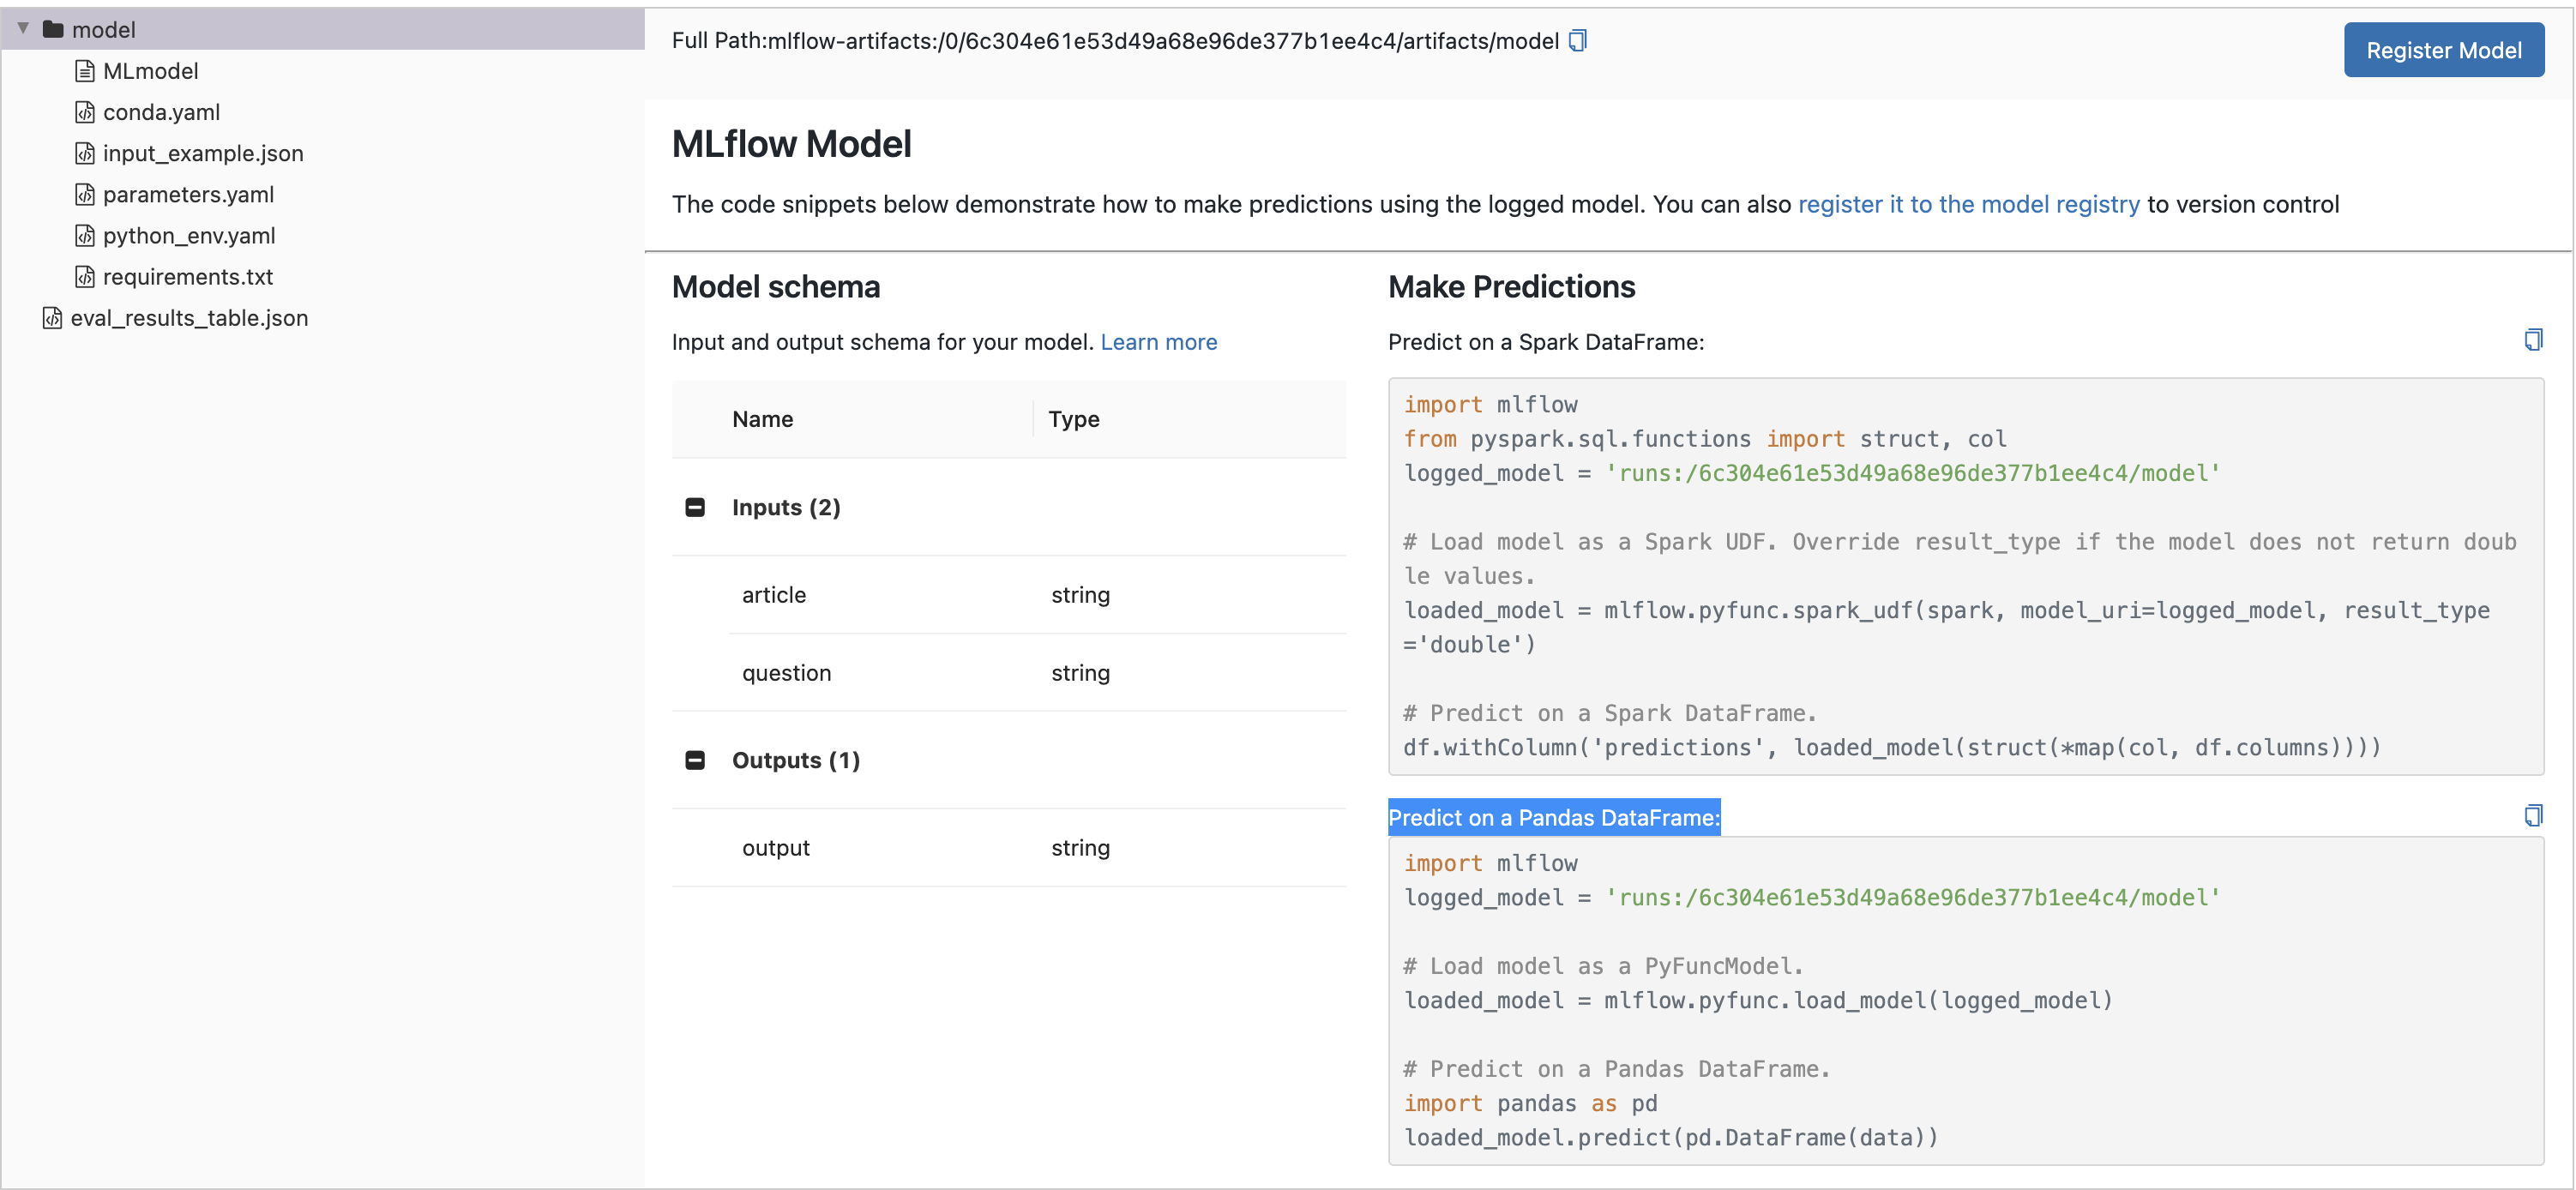
import mlflow

logged_model = "runs:/8451075c46964f82b85fe16c3d2b7ea0/model"

# Load model as a PyFuncModel.
loaded_model = mlflow.pyfunc.load_model(logged_model)
Then, to generate predictions, call the
predict()method and pass in a dictionary of input variables. For example:article_text = """ An MLflow Project is a format for packaging data science code in a reusable and reproducible way. The MLflow Projects component includes an API and command-line tools for running projects, which also integrate with the Tracking component to automatically record the parameters and git commit of your source code for reproducibility. This article describes the format of an MLflow Project and how to run an MLflow project remotely using the MLflow CLI, which makes it easy to vertically scale your data science code. """ question = "What is an MLflow project?" loaded_model.predict({"article": article_text, "question": question})
For more information about deployment for real-time serving with MLflow, see the instructions below.
Step 13: Perform metric-based evaluation of your model’s outputs
If you’d like to assess your model’s performance on specific metrics, MLflow provides the mlflow.evaluate()
API. Let’s evaluate our model on some pre-defined metrics
for text summarization:
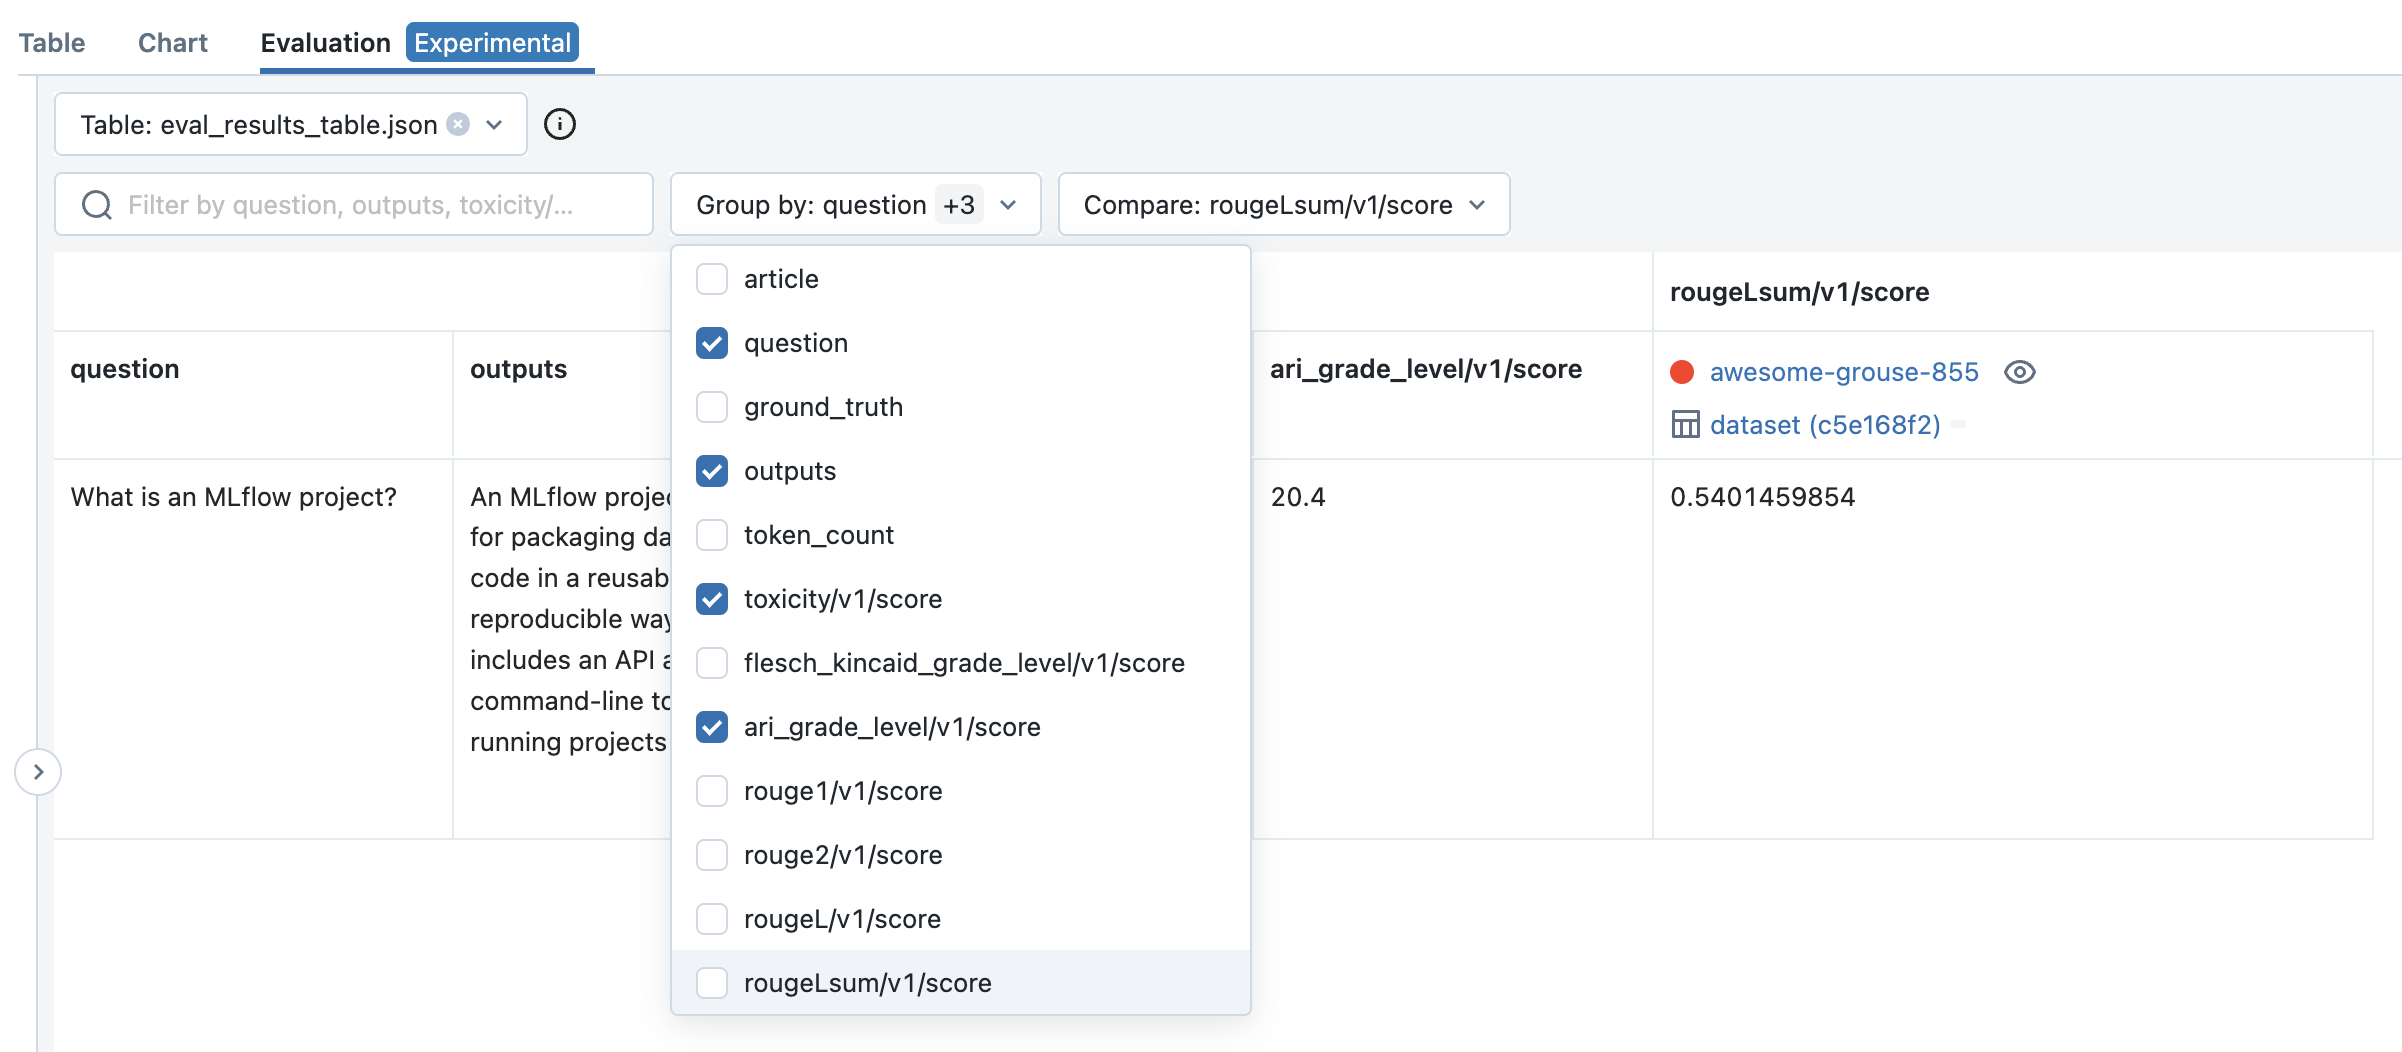
import mlflow
import pandas as pd

logged_model = "runs:/840a5c43f3fb46f2a2059b761557c1d0/model"

article_text = """
An MLflow Project is a format for packaging data science code in a reusable and reproducible way.
The MLflow Projects component includes an API and command-line tools for running projects, which
also integrate with the Tracking component to automatically record the parameters and git commit
of your source code for reproducibility.

This article describes the format of an MLflow Project and how to run an MLflow project remotely
using the MLflow CLI, which makes it easy to vertically scale your data science code.
"""
question = "What is an MLflow project?"

data = pd.DataFrame(
    {
        "article": [article_text],
        "question": [question],
        "ground_truth": [
            article_text
        ],  # used for certain evaluation metrics, such as ROUGE score
    }
)

with mlflow.start_run():
    results = mlflow.evaluate(
        model=logged_model,
        data=data,
        targets="ground_truth",
        model_type="text-summarization",
    )

eval_table = results.tables["eval_results_table"]
print(f"See evaluation table below: \n{eval_table}")
The evaluation results can also be viewed in the MLflow Evaluation UI:
The mlflow.evaluate() API also supports custom metrics,
static dataset evaluation, and much more. For a
more in-depth guide, see MLflow LLM Evaluation.
Deployment for real-time serving
Once you have found a configuration of LLM, prompt template, and parameters that performs well, you can deploy the corresponding MLflow Model for real-time serving as follows:
Register your model with the MLflow Model Registry. The following example registers an MLflow Model created from the Quickstart as Version 1 of the Registered Model named
"mlflow_docs_qa_model".mlflow.register_model( model_uri="runs:/8451075c46964f82b85fe16c3d2b7ea0/model", name="mlflow_docs_qa_model", )
Define the following environment variables in the environment where you will run your MLflow Model Server, such as a shell on your local machine:
MLFLOW_DEPLOYMENTS_TARGET: The URL of the MLflow AI Gateway
Use the mlflow models serve command to start the MLflow Model Server. For example, running the following command from a shell on your local machine will serve the model on port 8000:
mlflow models serve --model-uri models:/mlflow_docs_qa_model/1 --port 8000
Once the server has been started, it can be queried via REST API call. For example:
input='
{
    "dataframe_records": [
        {
            "article": "An MLflow Project is a format for packaging data science code...",
            "question": "What is an MLflow Project?"
        }
    ]
}'

echo $input | curl \
  -s \
  -X POST \
  https://localhost:8000/invocations
  -H 'Content-Type: application/json' \
  -d @-
where
articleandquestionare replaced with the input variable(s) from your prompt template.